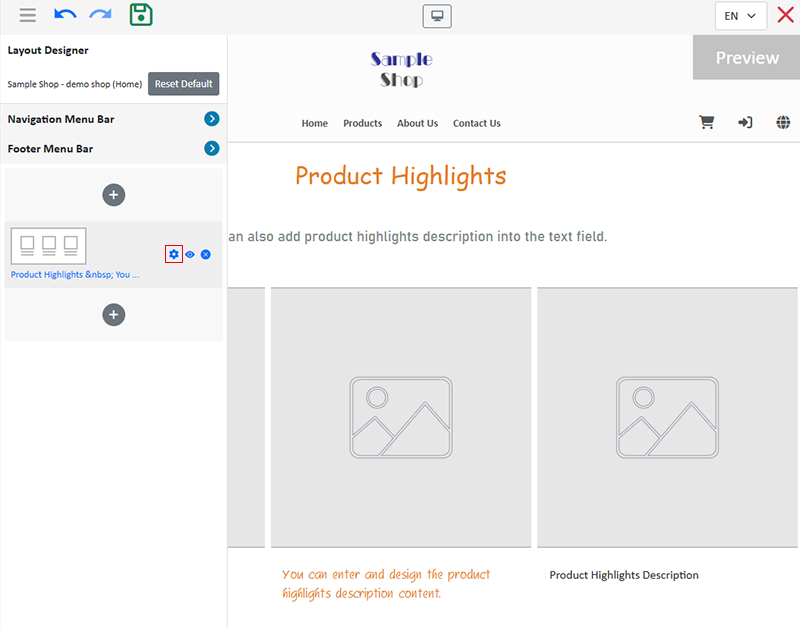
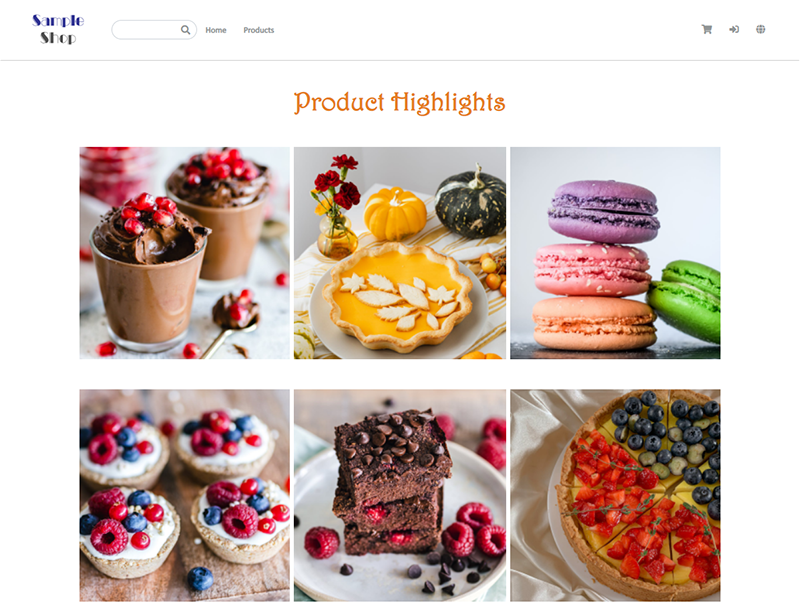
Product Highlights
The “Product Highlights” module on eshopland ecommerce platform is equipped with multi-functions for adding image, title, description and link for the highlighted products. You can also make photo gallery with this module to decorate your online shop webpages.
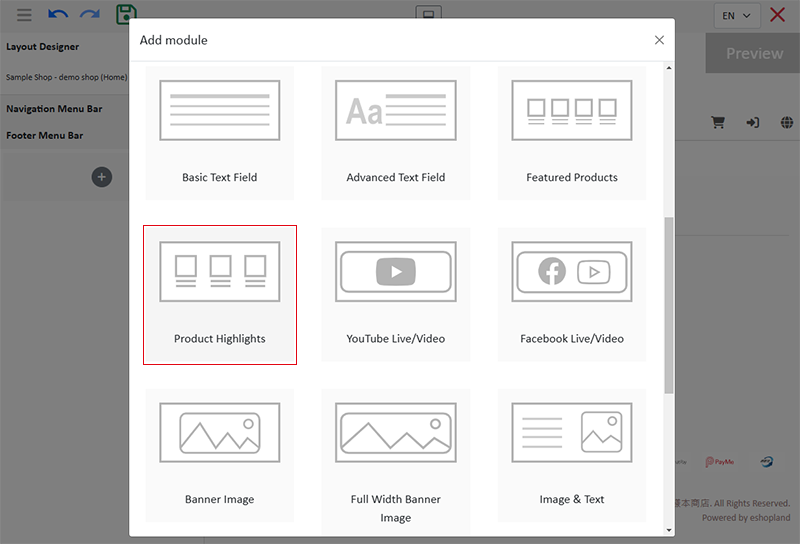
1. Add a Product Highlights Module
Go to Admin Panel > Design > Pages.
Select or add a page and enter the Layout Designer.
Press Add  to add a Product Highlights module.
2. Manage the Module
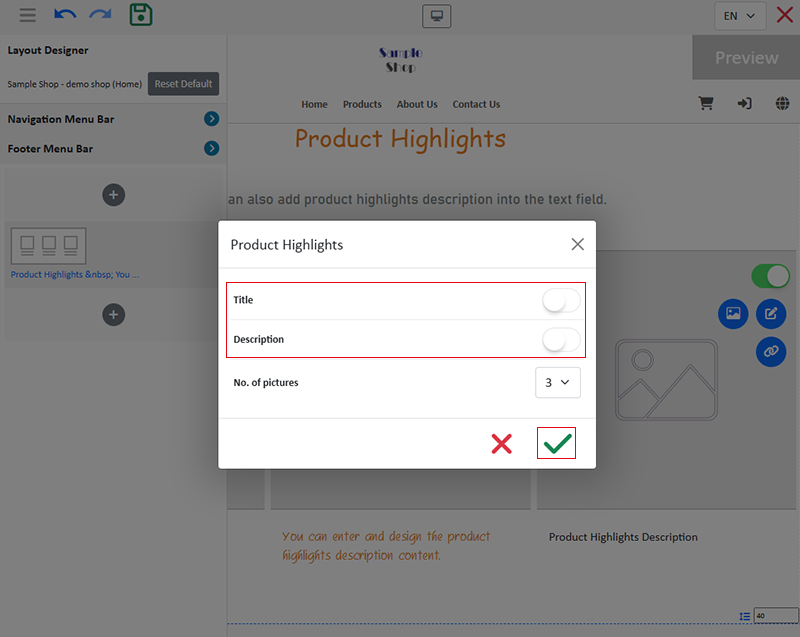
You can manage the following settings of the Product Highlights module:
Width
Interval
Background Color
Visibility
For more details about managing the modules, you can visit the Manage Modules tutorial.
3. Set the Title & Description of the Featured Products Module
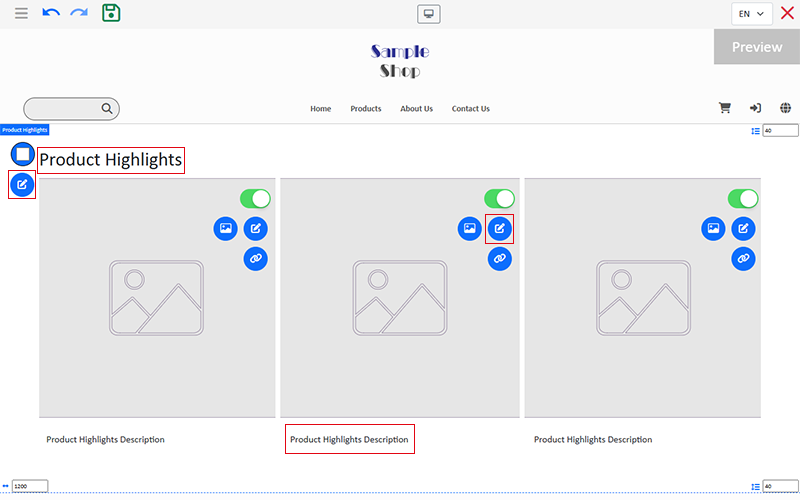
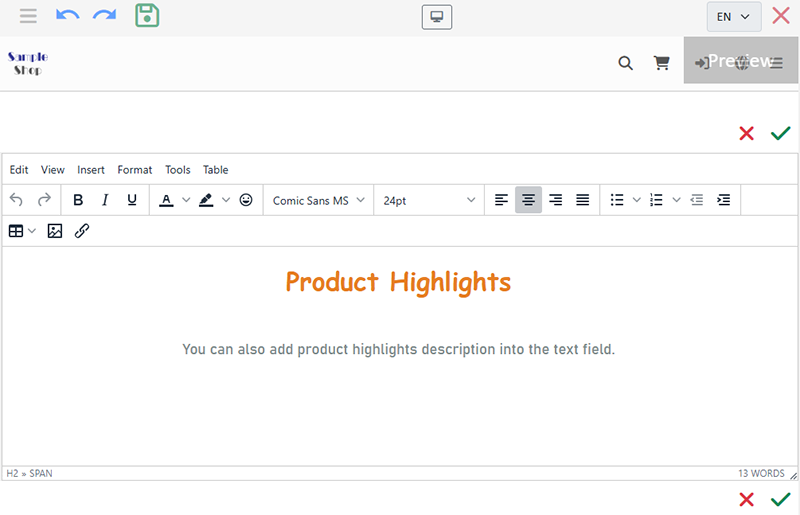
Click Edit  to enter the Title and Description text field.
The features of the text field is same as the Advanced Text Field, allowing you to design text content.
4. Hide the Title and Description of the Product Highlights Module
You can choose to Show or Hide the Title and Description of the Product Highlights Module.
Press the Menu  on the top left corner to expand the tools menu.
Press the Settings icon  of the module.
Disable  the Title and Description of the module,
then Confirm  .
.
The Title and Description of the Product Highlights module are Enabled  by Default.
You can hide the Title and Description of the Product Highlights module.
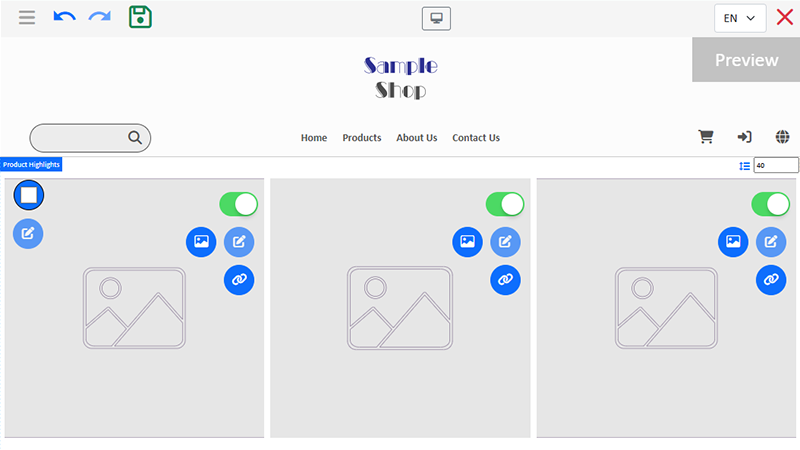
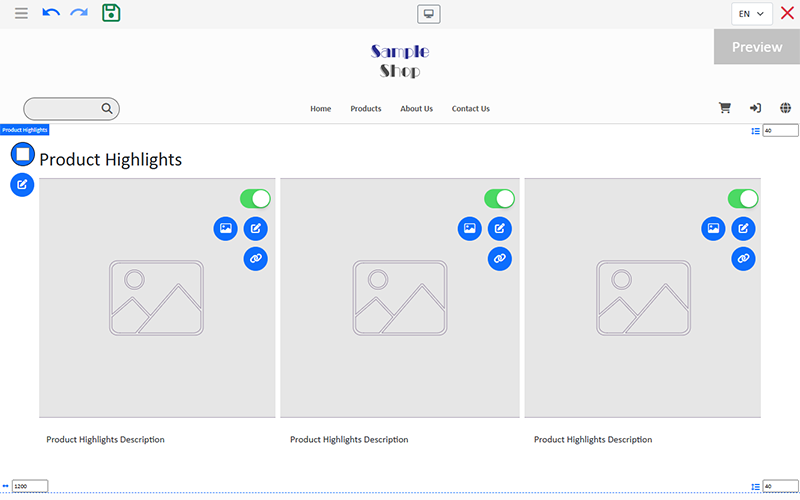
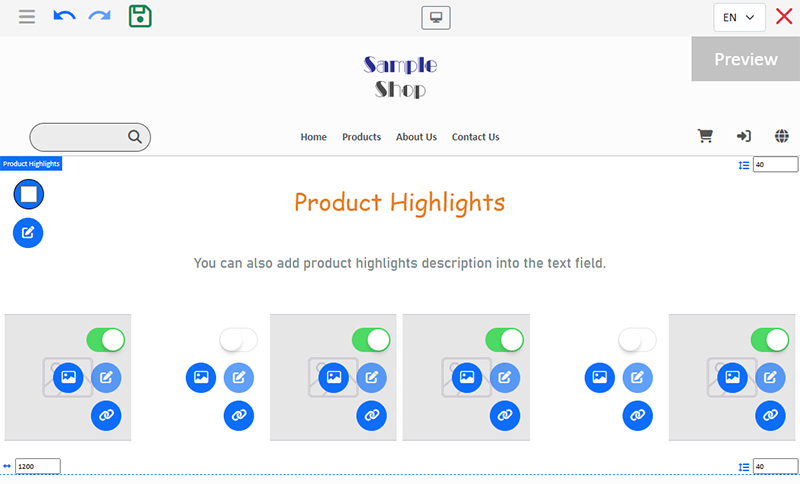
5. Set the Images of the Module
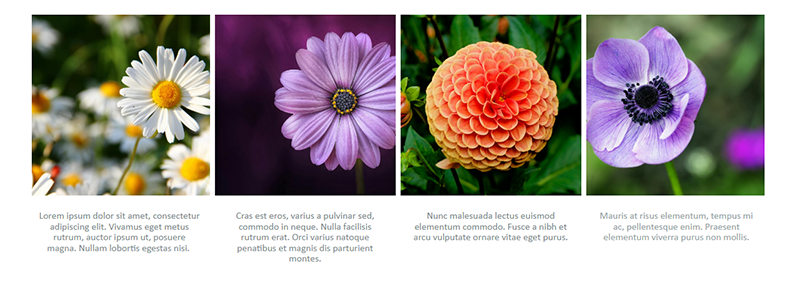
You can set the number of images to display in the Product Highlights module, from 2 to 7 images.
Select the Quantity, then Confirm  .
.

Enable  or Disable
  the “Image & Content”.
The entire block that has been disabled will hide automatically.
Click Image  to add an image for each block.

6. Add a Link
Click Link  on the block to add links to specific pages, categories, products, or other URLs to images.
Optional.
7. Design Effects
By utilizing the various features of the Product Highlights design module, you can create different effects.
Adding two Product Highlights modules continuously, you can create a photo gallery effect on your shop webpage.
8. Apply
Save  the changes.
Popular Articles


You May Also Like
Custom Shipping
eshopland allows you to customize shipping methods, such as pick-up, charge on delivery, local courier, etc. to suit your business operational requirements.1. Shipping SetupLogin and go to the Admi... [read more]
Order List Overview
You can view the basic details and instant status of the orders on the order list. The order list is also equipped with filtering and bulk action features for more efficient management.1. The Order ... [read more]
Stripe Auto Payment Method
eshopland platform supports the international well-known payment platform, Stripe, as one of the payment methods of your online shop. Your customers will be able to shop and pay by credit cards and ... [read more]
Using Points and e-Coupons for Checkout
Merchants who run online shops on eshopland e-commerce platform, and select specific service plans can set different membership points and e-coupon offers for shop members to redeem and enjoy. Membe... [read more]