Advanced Text Field
The advanced text field module is equipped with different text formatting and styling features. You can write the shop content and design the layout with this functional module.
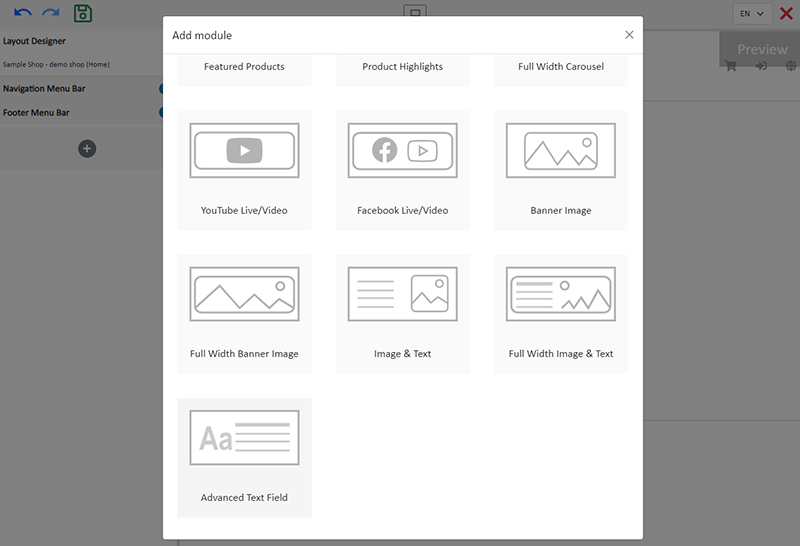
1. Add a Advanced Text Field Module
Go to Admin Panel > Design > Pages.
Select or add a page and enter the Layout Designer.
Press Add  to add a Advanced Text Field module.
2. Manage the Module
You can manage the following settings of the Advanced Text Field module:
Width
Interval
Background Color
Link
Visibility
For more details about managing the modules, you can visit the Manage Modules tutorial.
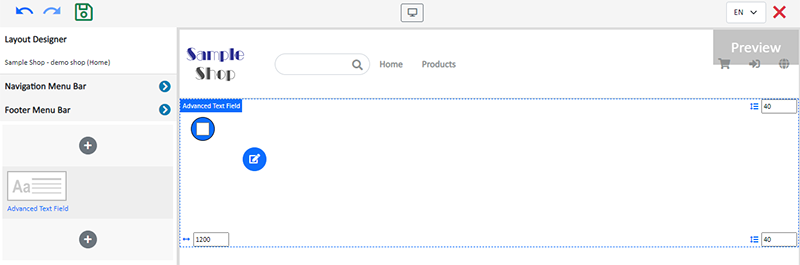
3. Set the Advanced Text Field Module
Click Edit  to enter the Advanced Text Field.
You are required to type in text content into different language pages respectively.
You can utilize the Traditional-Simplified Chinese Conversion feature when tying in Chinese content into the Chinese fields.
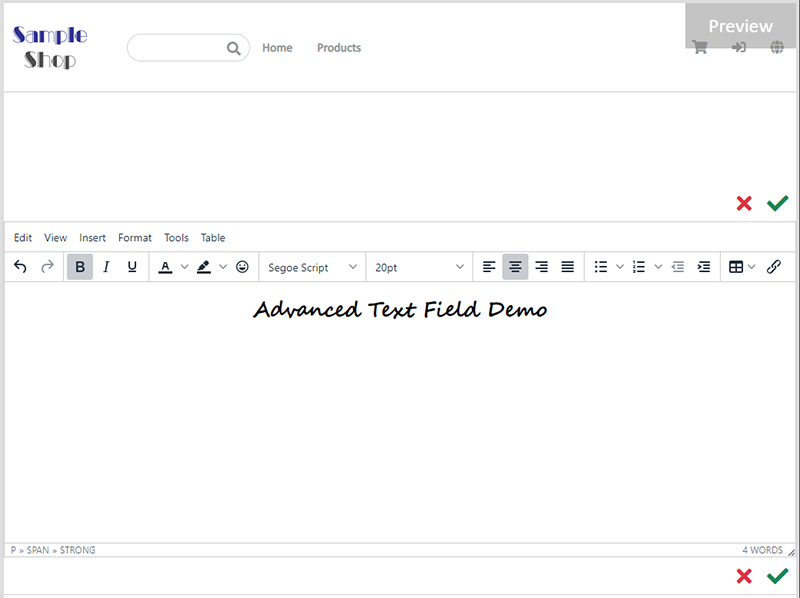
Functions of the Advanced Text Field include:
Paragraphing
Text Formatting (Bold, Italic, Underline, Strikethrough)
Font Color (Color, Background Color)
Font (English and Chinese Fonts)
Font Size (Using pt or vmax as font unit)
Alignment, Indent
Listing (Bullets, Numbering)
Horizontal Line
Symbols (Special Characters, Emotions)
Tables
Date/Time
Word Count
Link
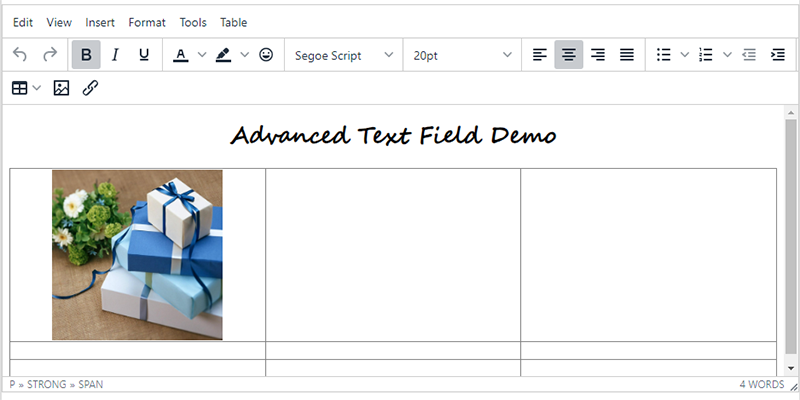
4. Advanced Text Field Image Settings
Insert Image
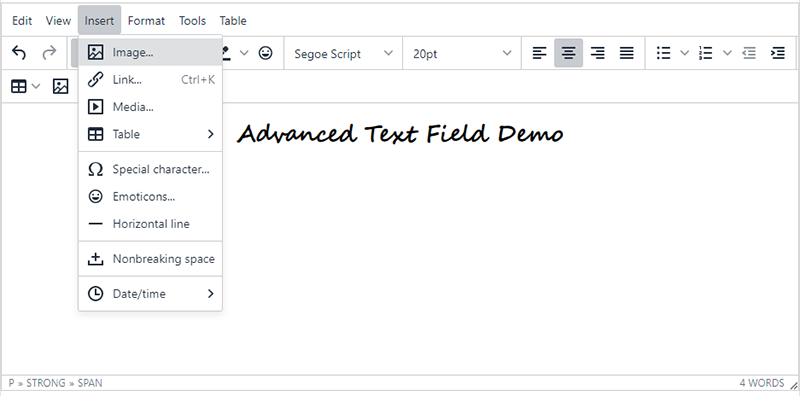
Enter an image link (Source) or select an image from the Media Gallery (Image List).

You can also press the “Upload” button to insert an image directly from your computer or devices into the text field.
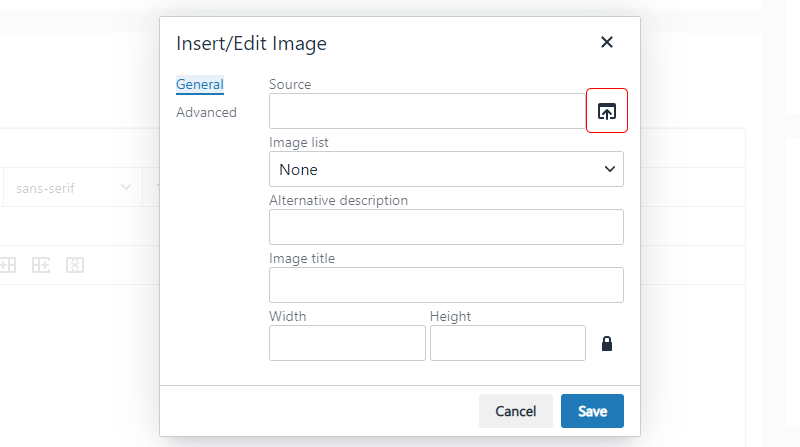
Insert an image, then you can adjust the Width and Height of the image.
When you set the image Width to “100%” and Height to “auto”, the system will auto-resize the image proportionally according to the module width. The image will not be cropped.
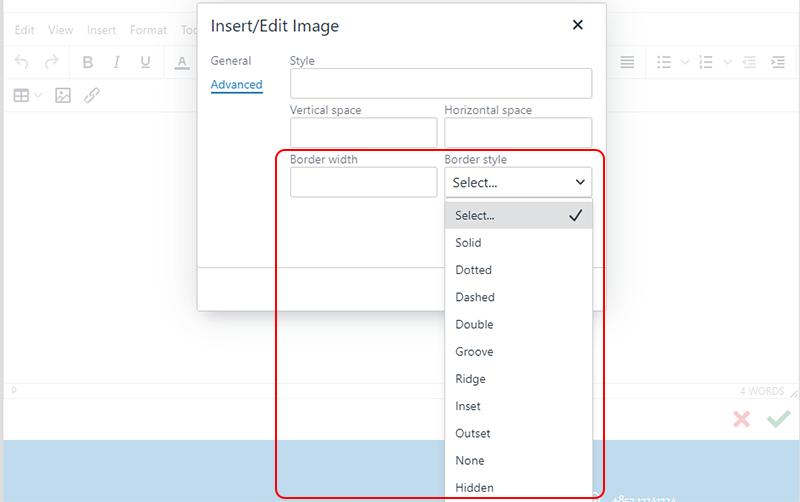
Select the image and right-click to set the attribute of the image.

Enter Advanced to add border for the image.
5. Advanced Text Field Table Settings
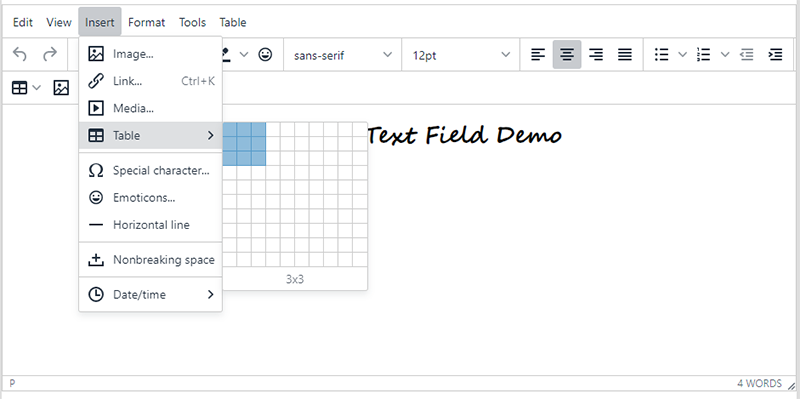
Insert Table
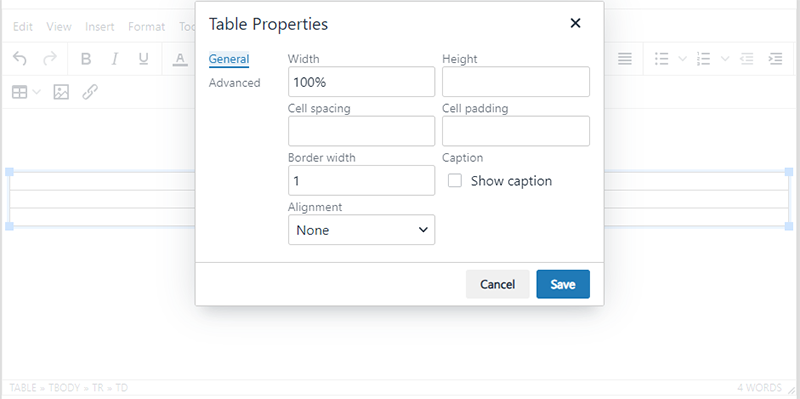
You can adjust the Width and Height of the table and also add border for the table.
Select the table and right-click to set the attribute of the table.
You can add image onto the table and adjust the attribute of the image.
6. Apply
Save  the changes.
Popular Articles


You May Also Like
Add & Manage Images
Merchants can utilize the multifunctional media gallery on eshopland online shop platform to add product images, design picture and media files. You can create different folders in the media gallery... [read more]
Create a Manual Order in Backend
To satisfy the operational needs of different merchants, eshopland ecommerce platform is equipped with creating manual orders feature (also commonly known as “create orders in admin”). This feature ... [read more]
Shop Page Layout Designer
eshopland Layout Designer is equipped with functions for merchants to design web pages for their shops. The Layout Designer is comprehensive, user-friendly and allows merchants to design the layout ... [read more]
YouTube Live and Video
You can add YouTube live streaming and videos onto the eshopland online shop to promote your online shop and products, improve shop’s reputation and attract more traffic.1. Add a YouTube Live/Vide... [read more]