Start Free Trial and Register Your Shop
Follow the steps below to register for a shop account, build your eshop and experience the services on eshopland for free. Just a few steps to start running your online business.
1. Go to eshopland’s website: https://www.eshopland.com/
2. Click “Free Trial” or “Start Free Trial” to register.
3. Enter your Name, correct Email Address and Password. Then click “Register”.
Note:
The email and password you entered for registration would be required for signing into your account.
The registered email would be set as your account email by default for receiving order notifications, payment alerts, invoices/receipts, system messages, etc.

4. You will reach the “Registration Successful!” page. Set Country or region, Currency and Time zone.
Country or region – the physical location of your business
Currency – the transaction currency of your online shop
Time zone – the time zone of your location (The system will show your order details and activity logs based on this time zone.)

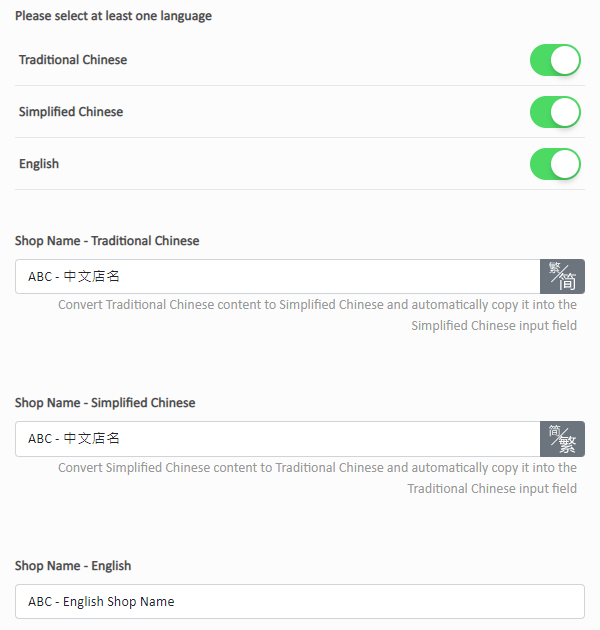
5. Set Language for your shop.
You can choose to show your shop’s webpages and products in Traditional Chinese, Simplified Chinese and English respectively.
The system will generate your shop and product fields according to your Language settings.
You are required to select at least one language for your shop.
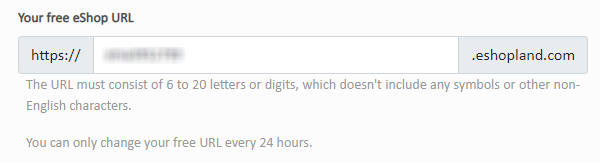
6. Enter Your free eShop URL.
This is your free and unique shop link.
If you would like to use your own domain name, you can complete the corresponding settings on the admin panel upon purchase of designated eshopland service plan.
7. Complete.
Click “Create your eShop”.
Your online shop has been created successfully and set to “Preparing” status by default.
Popular Articles


You May Also Like
Social Media Links
eshopland allows you to add social media link icons onto the footer of your online shop webpage. Connect your social media accounts with your online shop can enhance promotional results and boost sa... [read more]
Hongkong Post EC-GET Order Management
Merchants can automatically generate Hongkong Post EC-GET address labels on eshopland system backend. They can print the labels and post directly without paying any additional service fees or instal... [read more]
Add a Page
Designated plan users on eshopland ecommerce platform can add custom pages, design page layouts, such as including promotional online shop campaigns, introducing membership loyalty point programs, p... [read more]
Discount on Specified Products
On eshopland platform, merchants can set up percentage discount on specified products to boost sales. Merchants can also incorporate various discount terms to align with your operational requirement... [read more]