Tracking Tools – Google Analytics
On eshopland platform, you can add Google Analytics to track the page traffic, visitors, sessions and other customer behaviors on your online shop.
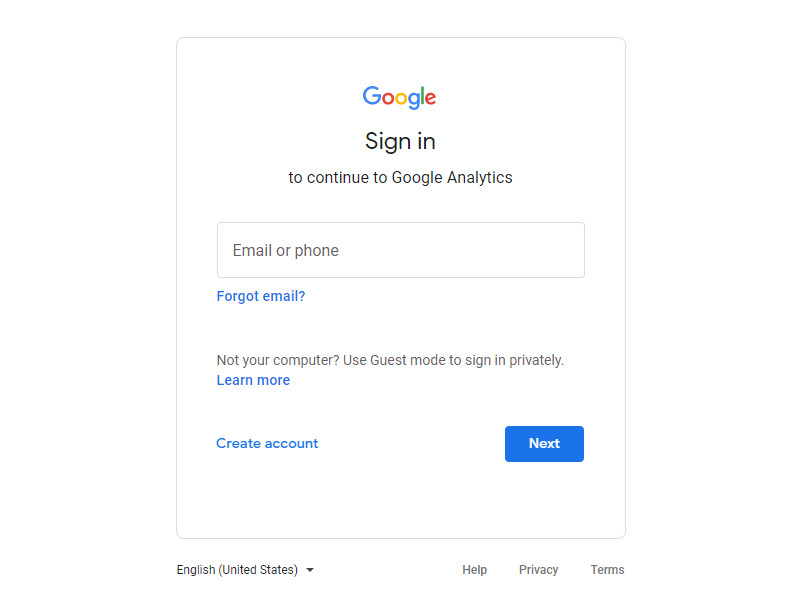
1. Sign in Google Analytics
You are required to Create your Google Account, and Sign in your Google Account in order to use the Google Analytics service.
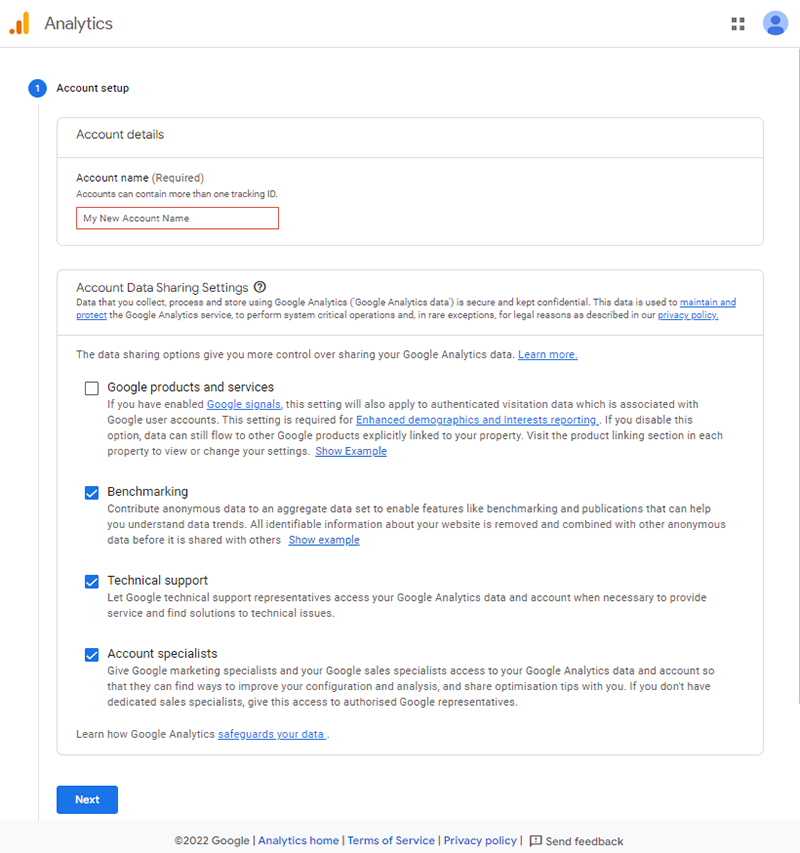
2. Create your Google Analytics Account
Sign in Google Analytics and press “Create Account”.
Enter your Account Name (Required) and press “Next”.
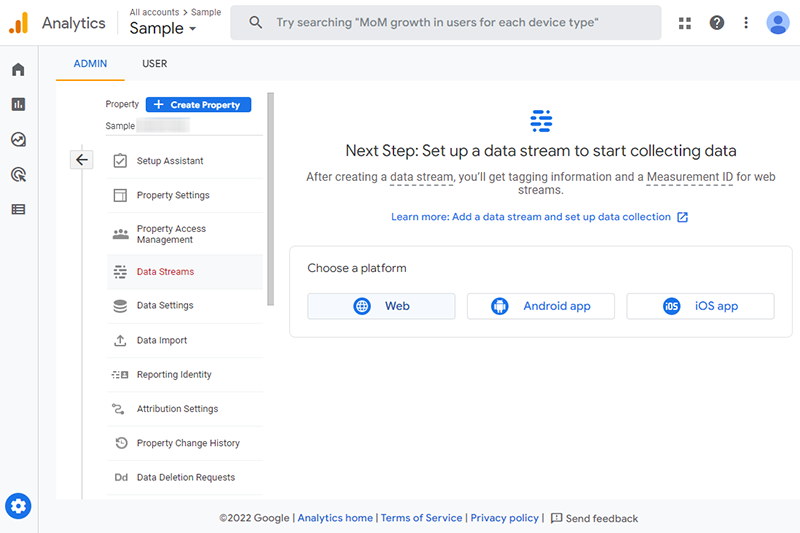
If you already have your Google Analytics Account, you can press “Admin” on the bottom left corner, select an account and begin to “Create Property”.
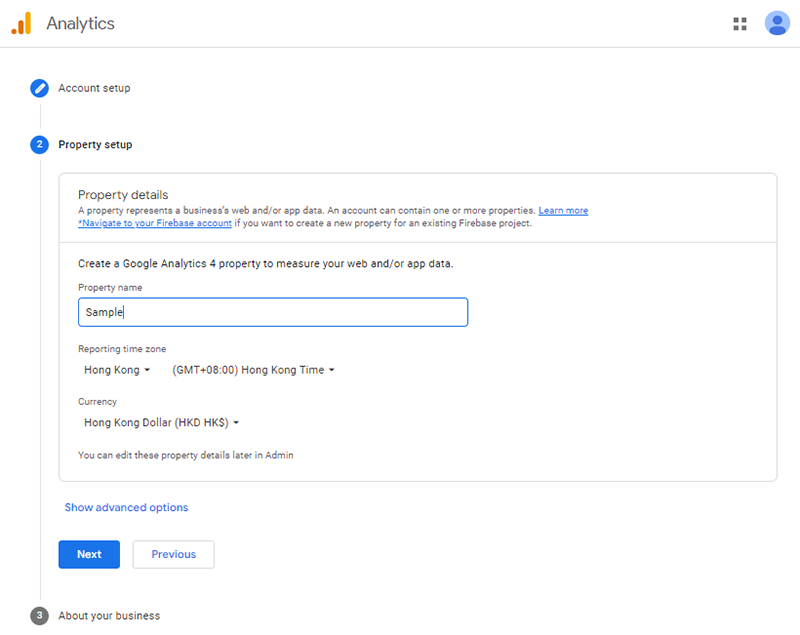
3. Create Google Analytics 4 Property
Set the Property name, Reporting time zone and Currency as required.
eshopland supports the latest version of Google Analytics 4.
If you want to create a Universal Analytics property, click on “Show advanced options” to set up. Universal Analytics properties will stop collecting data starting 1 July 2023.
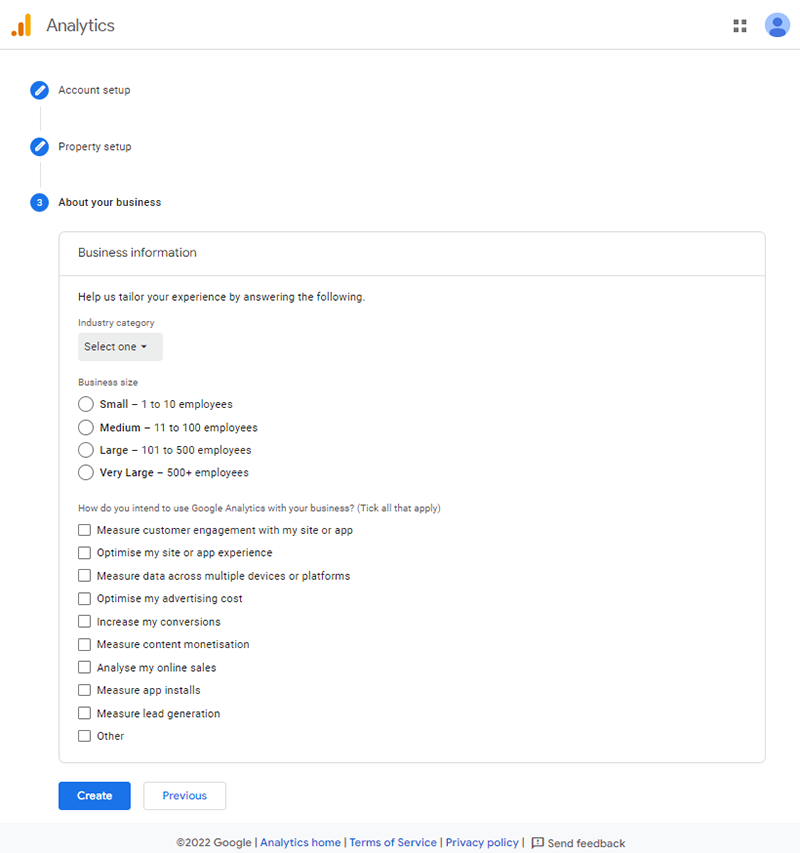
4. Set up your Business Information
Complete the form by setting your Industry category, Business size and Google Analytics options, then press “Create”.
5. Create a Data Stream
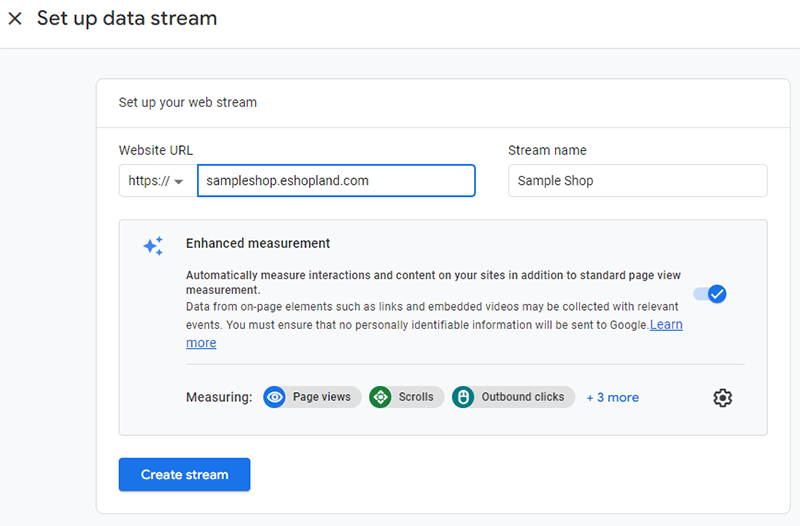
Choose “Web” on the page.
Fill in the URL of YOUR online shop and create a Stream name, then press “Create Stream”.
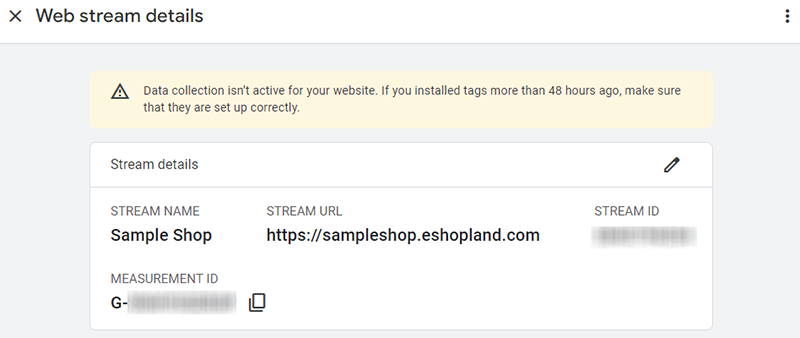
A Google Analytics 4 Web Stream has been created and it will auto generate a unique Stream ID and Measurement ID.
6. Add the Google Analytics 4 Property ID onto your eshopland account
Copy the Google Analytics 4 Property Measurement ID (G-XXXXXXXXXX).
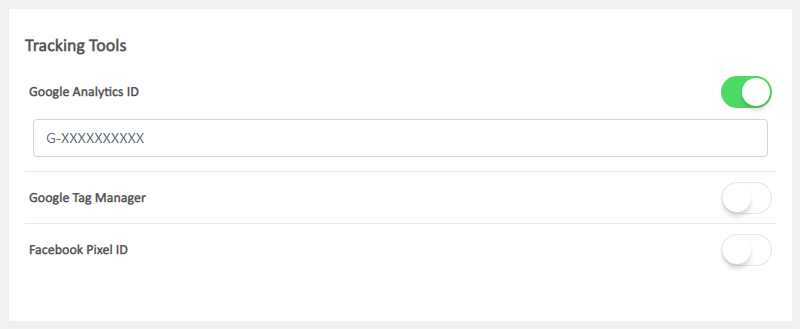
Go to eshopland Admin Panel > Settings > Integration > Tracking Tools.
 Enable Google Analytics ID and paste the Google Analytics 4 Property Measurement ID into the field, then press Save
  .
.
Google Analytics tracking has been added to the shop, you can view the traffic and analytics on Google Analytics page or app.
It may take up to 48 hours for the data collection to be active and viewable on Google Analytics after pasting the Measurement ID onto the Admin Panel.
Popular Articles


You May Also Like
Themes (Shop Templates)
eshopland platform offers different themes in various design styles for you to select and apply onto your online shop. Simply change the images and edit the text, your shop will be ready at a glance... [read more]
QFPay Online Payment
eshopland ecommerce platform integrated with QFPay payment gateway system which supports various payment methods such as credit cards, digital wallets and other online & offline payment methods. esh... [read more]
Custom Shipping
eshopland allows you to customize shipping methods, such as pick-up, charge on delivery, local courier, etc. to suit your business operational requirements.1. Shipping SetupLogin and go to the Admi... [read more]
Verify Ownership on Google Search Console
Verify site ownership on Google Search Console and use the official Google Search Console tools and reports to know more about your site’s impressions, clicks and position on Google Search.1. Sign f... [read more]