Tiered Membership Scheme Overview
On eshopland ecommerce platform, merchants can customize the terms of the membership scheme of their online shops, not only to attract new customers but also encourage member customers to keep spending on the shops in order to enjoy the special offers and promotions which eligible for the specified membership tier.
“Advanced” plan users can use the basic features of the “Membership”. Merchants can customize the membership tier name and set member price on the product pages.
Tired Membership Scheme feature is only available for “Professional” plan users, please visit our Pricing for more details.
1. Enable the Membership Scheme
Merchant enabling the Membership Scheme means:
A customer can register as a member of the online shop.
Member customer can check one’s order records and make return or refund request through the member account.
Member customer can sign in the shop and enjoy special promotions offered for members only.
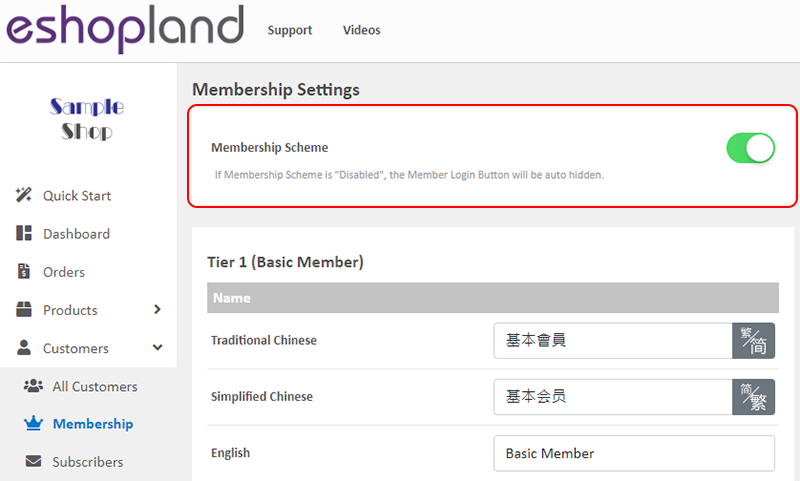
Go to Admin Panel > Customers > Membership,
Enable  Membership Scheme.
If the Membership Scheme is “Disabled”, the member sign in button on the shop webpages will be auto hidden.
2. Customize the Membership Tier Name
Merchant can customize the Membership Tier Name.

Note: The following features are available for “Professional” plan users only.
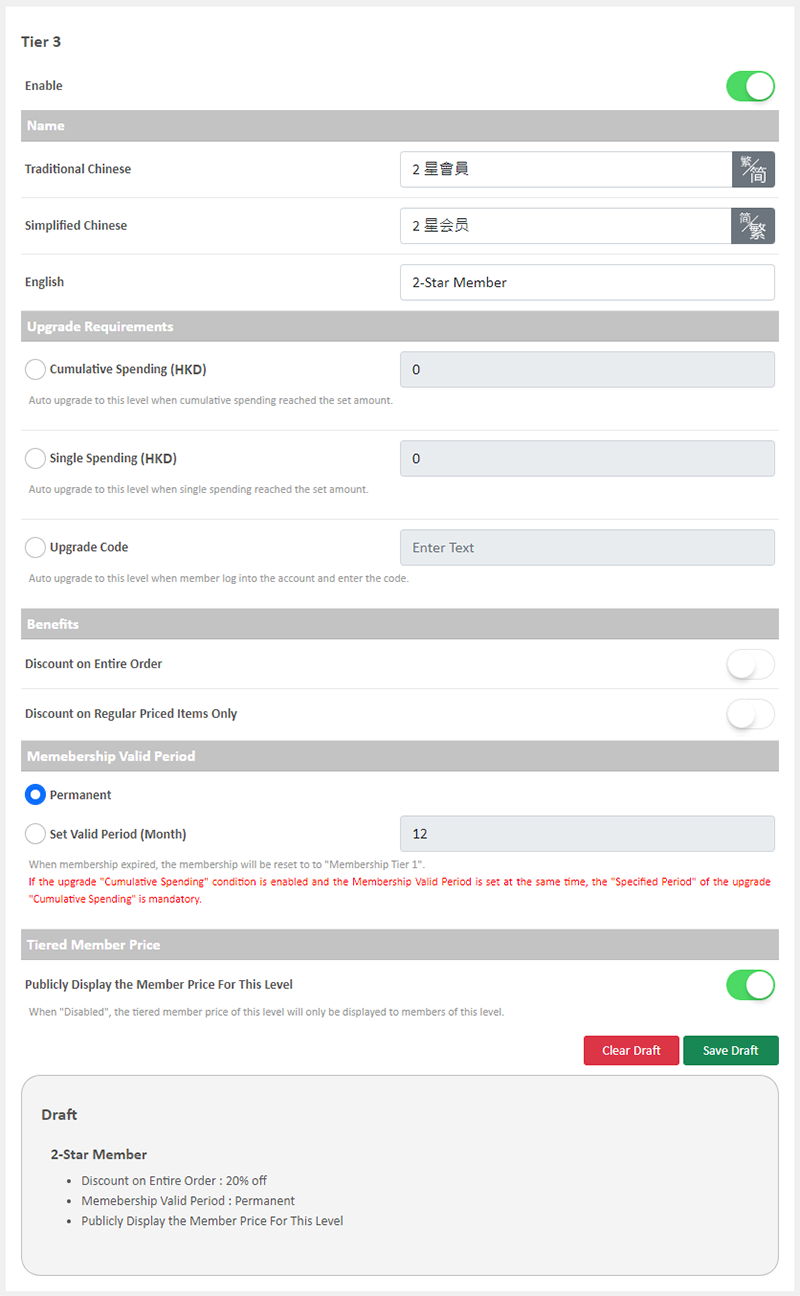
3. Customize the Membership Scheme
“Professional” plan users can customize the Membership Scheme of the online shop.
Customize the number of tiers of membership, up to 5 tiers in total.
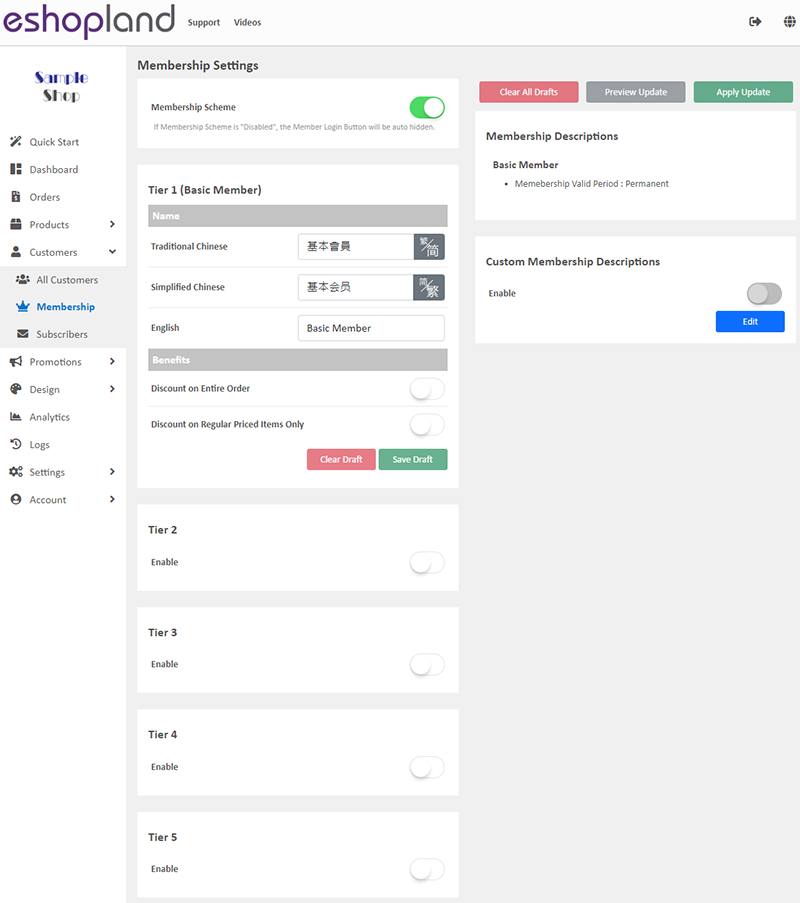
Merchant can customize and set the membership benefits, upgrade terms and membership valid period of the online ship.
To learn about the settings, please read Membership Tiers Benefits Settings and Membership Upgrade and Renewal Settings.
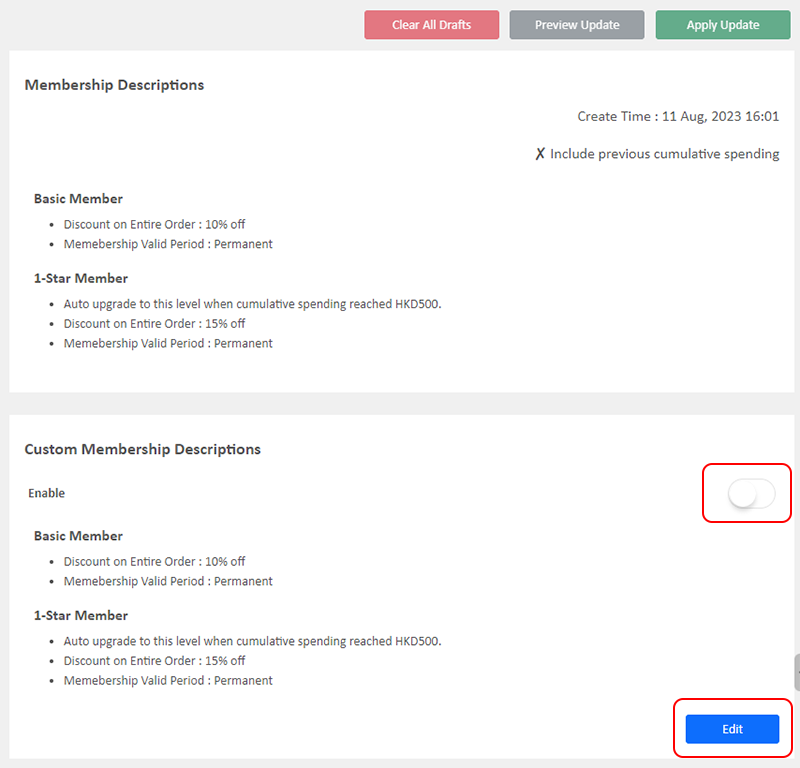
4. Preview Update
Press “Preview Update” after any settings update to preview the entire membership scheme content.
Preview feature is for proofreading and checking purposes only, “Preview Update” will not update any of the membership content.

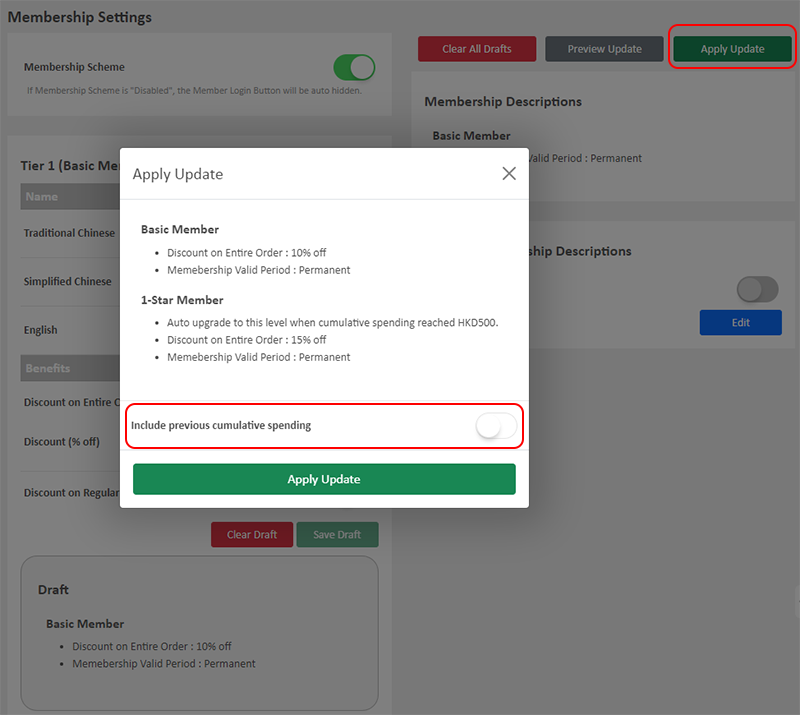
5. Apply Update
After previewing, press “Apply Update” to apply the updated content.
“Apply Update” and the updated content will be effective immediately.
The system will auto calculate the spending amounts of the customers and auto update the upgrade and benefits.
Note:
The order amounts will only be counted as cumulative spending or single spending when the order status are set to “Paid” and “Completed”.
Merchants are recommended to review and update the order status regularly.
If “Include previous cumulative spending” is Disabled  :
:
The system will auto calculate starting from the “Apply Update” time.
Only new orders created after the “Apply Update” time, and the order status have been set to “Paid” and “Completed” will be counted.
If “Include previous cumulative spending” is Enabled :
The system will auto include all “Paid” and “Completed” orders.
6. Custom Membership Descriptions
Press “Press” to open the text field and customize the Membership Descriptions text content, in different languages respectively (if any).
When the editing is completed, Enable the Custom Membership Descriptions to apply the customized content immediately.
Popular Articles


You May Also Like
Quickly Link Page to Menus
Merchants can quickly add pages to the navigation menu or footer menu of the online shop website by following the steps below.1. Select PageGo to theAdmin Panel>Design>Pages.Select the page to be add... [read more]
Full Width Product Page
Applying a full width page design on the online shop can offer users a more engaging experience. By utilizing the flexible web design features of eshopland ecommerce platform, merchants can design ... [read more]
Macau e-Wallets Payment
To satisfy the payment requirements of Macau merchants, eshopland ecommerce platform has incorporated a series of Macau-specific static QR code payment methods (including: BOC Pay (Macau), CGBPay, ... [read more]
Service Plan Upgrade
eshopland ecommerce platform understands that merchants have different budgets and requirements. To provide merchants with greater operational flexibility, after purchasing eshopland monthly or year... [read more]