Manage Membership e-Coupons
Merchants can manually issue, adjust and manage members' e-coupons (commonly known as 'shopping credits') through the online shop admin panel, to fulfill the actual needs of the online shopping business.
1. Customer Record
Go to Admin Panel > Customers > All Customers, then select the customer data that needs to be managed from the customer list.
2. Membership e-Coupon Record
Merchants can access and view members’ e-coupon records and expiration dates.
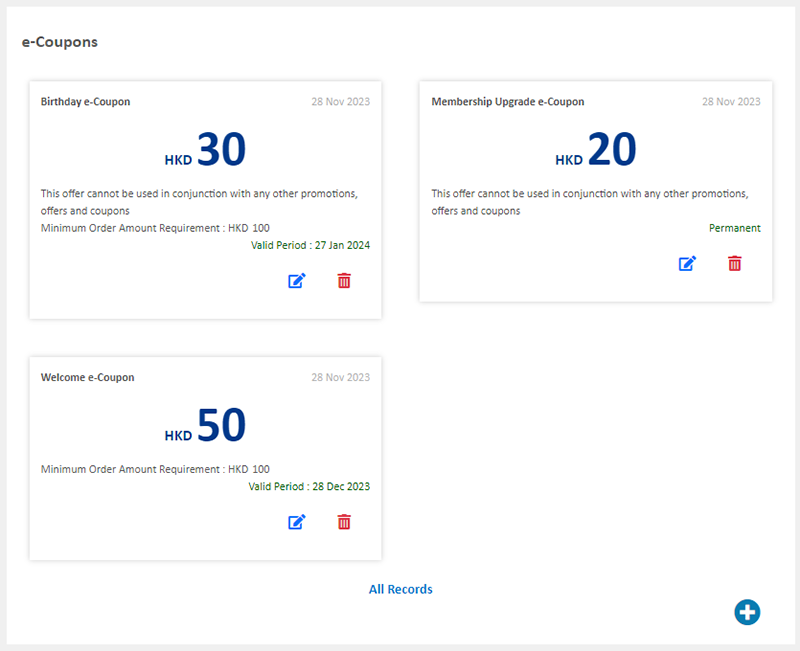
Click “All Records” to view the details of the member’s e-coupon records.

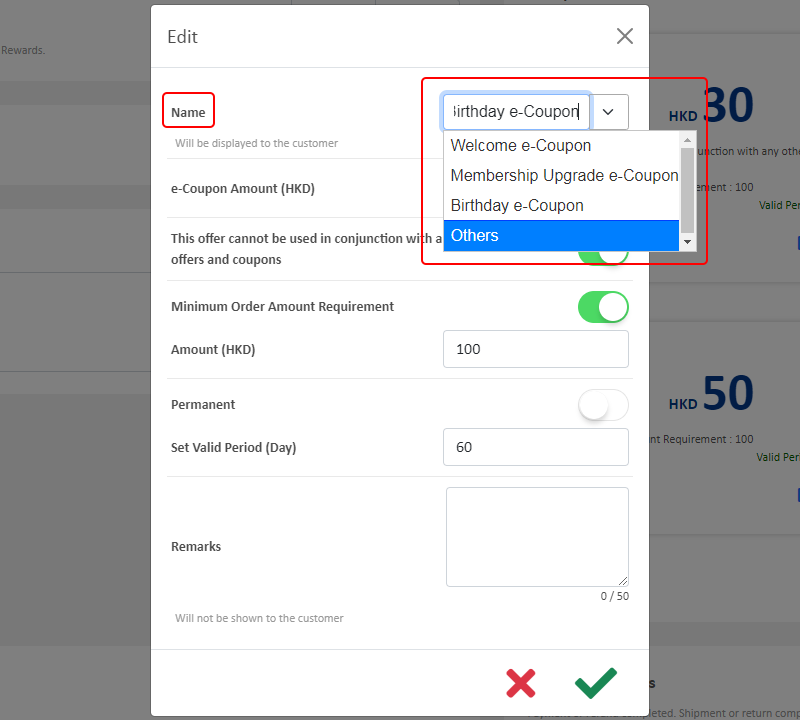
3. Manually Manage e-Coupon Record
Click on Edit  in the points record list to manage the e-coupon record.
Merchants can customize the name of the e-coupon.
Modifying the name of an e-coupon will also update the record in the customer's account information.
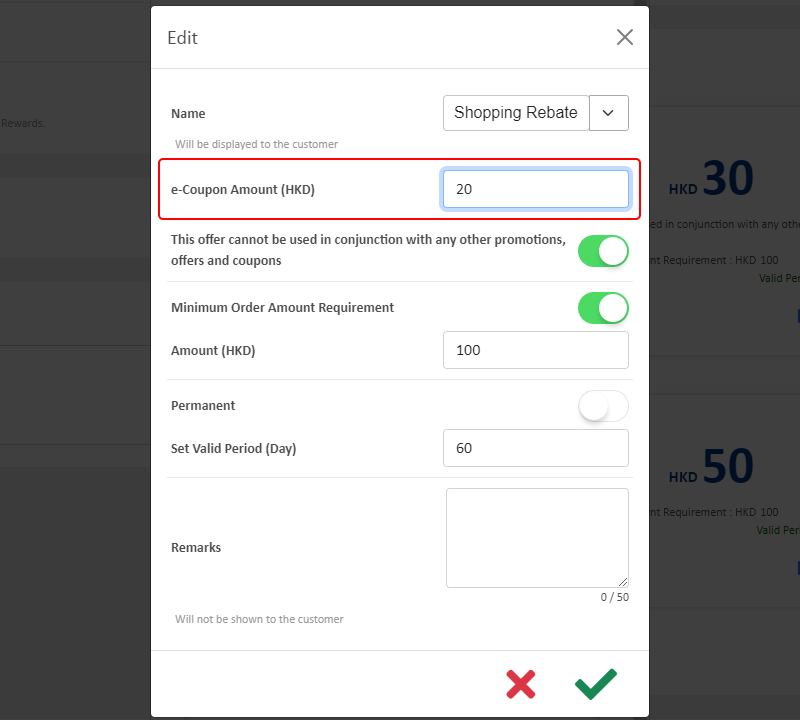
Enter a number to instantly update the value of the e-Coupon.
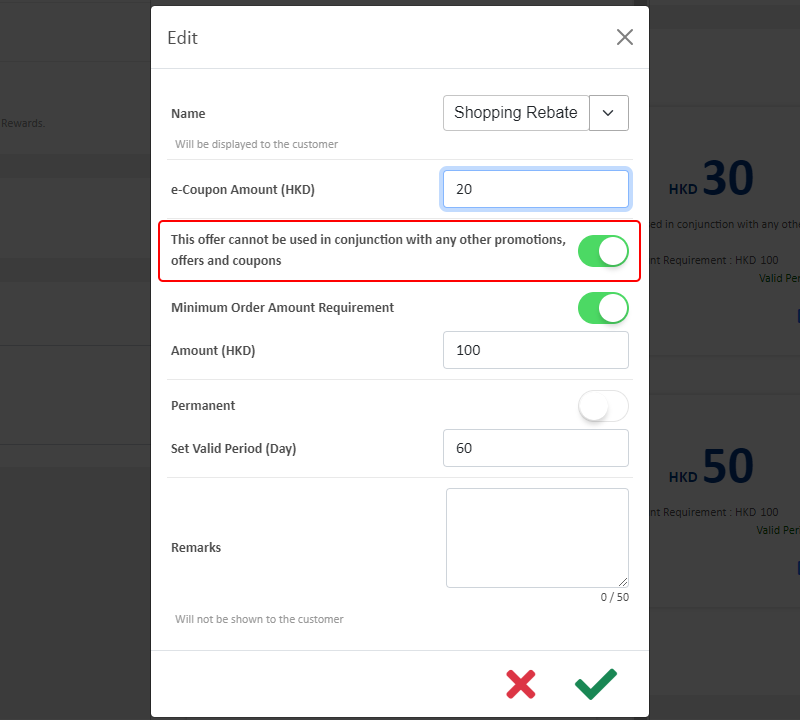
Merchants can modify whether the e-Coupon can be used in conjunction with any other offers.
Merchants can enter an amount to modify the minimum requirement for using the e-coupon or directly Disable  the “Minimum Order Amount Requirement” feature.

Merchants can enter the number of days to modify the validity period of the e-Coupon or set the e-Coupon to be “Permanent”.
The system will automatically calculate the validity period of all e-Coupons.
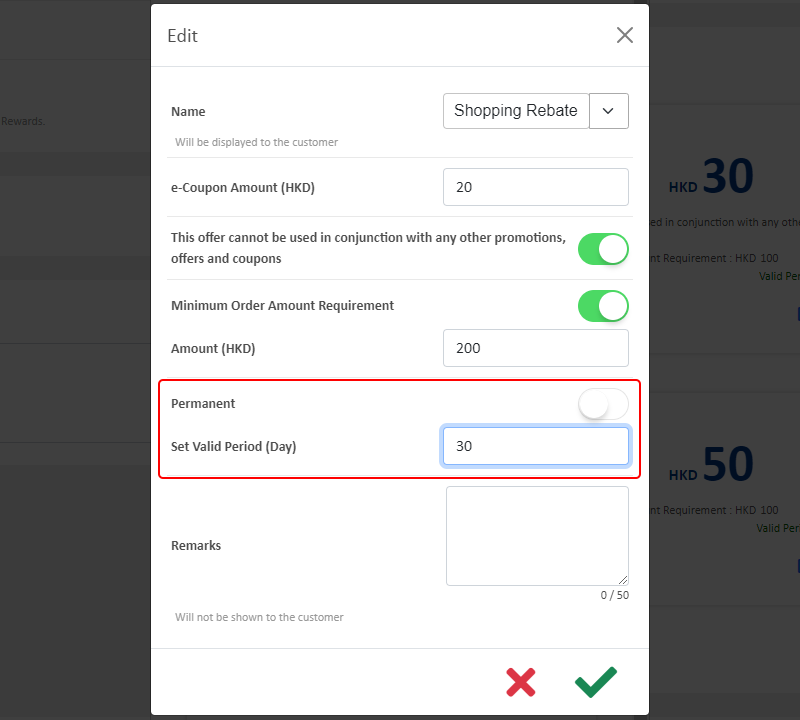
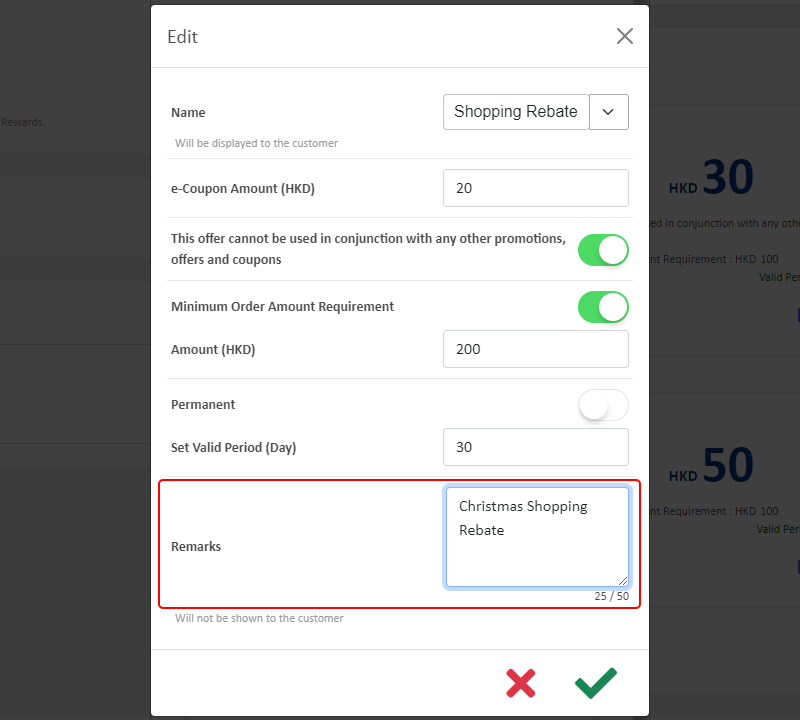
Merchants can add remarks (optional) to the e-Coupon adjustment record.
The remarks are for internal record only; it will not be shown to the customer.
Confirm  when finished and the e-Coupon will be updated immediately.

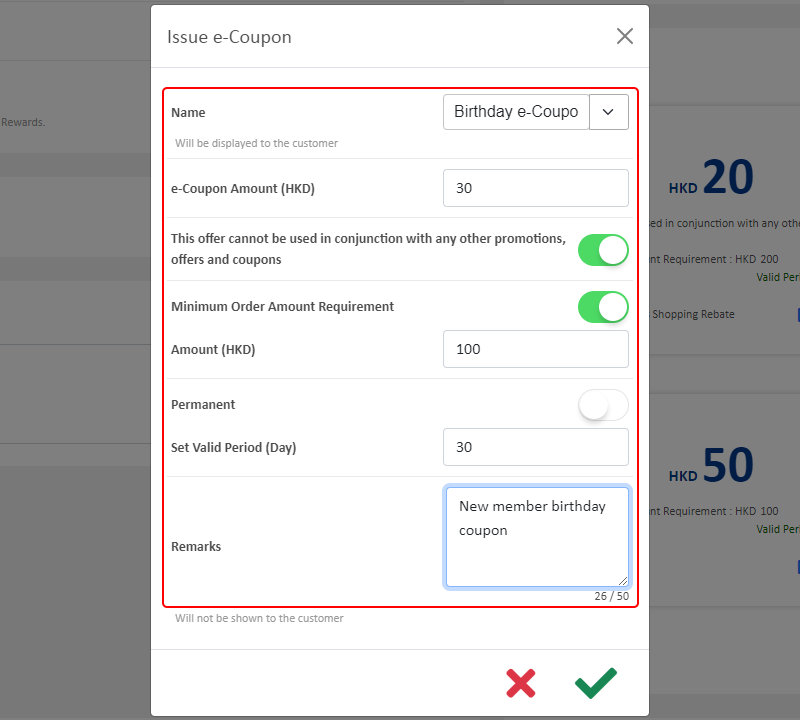
4. Manually Add Membership e-Coupon
Click on Add  in the points record list to add a new e-Coupon.
Enter the name of the e-Coupon
Set the value of the e-Coupon
Set whether the e-Coupon can be used in conjunction with any other offers
Set the minimum order amount requirement of the e-Coupon
Set the e-Coupon validity period
Enter the Remarks (optional)
Confirm when finished
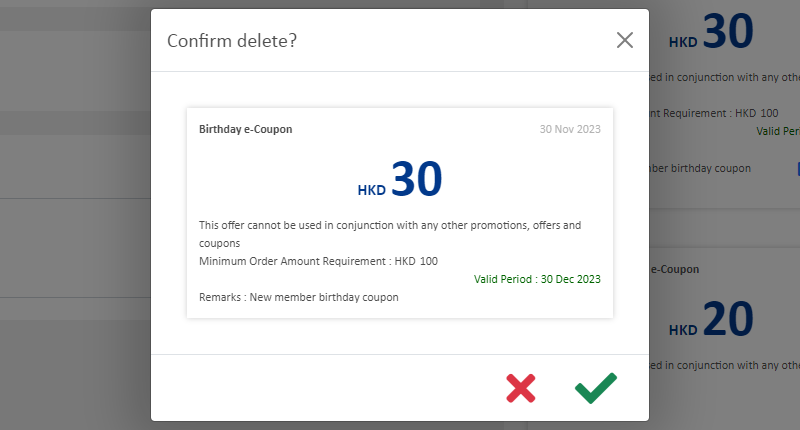
5. Delete an e-Coupon
Click on Delete  in the e-Coupons list to delete an e-Coupon.
The deleted e-Coupon cannot be restored.
Popular Articles


You May Also Like
Submit Sitemap to Google
All eshopland shops auto generate sitemap, which is sitemap.xml file providing information of a website. Search engines read this file to crawl the website more efficiently. You only have to submit ... [read more]
Connect your GoDaddy Domain
After purchasing a domain on GoDaddy, you can follow the steps below to connect your GoDaddy domain to the eshopland e-commerce platform, to be your online shop's URL.Before operating on GoDaddy por... [read more]
Instagram Auto-receive Post Orders
eshopland e-commerce platform has launched the Instagram (IG) Auto-receive Post Orders feature, allowing merchants to effortlessly receive customer orders through Instagram Business Account posts. W... [read more]
Hongkong Post EC-GET Order Management
Merchants can automatically generate Hongkong Post EC-GET address labels on eshopland system backend. They can print the labels and post directly without paying any additional service fees or instal... [read more]