Free Self-Pickup
eshopland ecommerce platform supports multiple shipping methods, to match merchants’ operational requirements and satisfy customers’ different shipping needs. Setting free self-pickup as a shipping method, customers can pick up orders at store, office or a designated location.
1. Adding new Shipping Method.
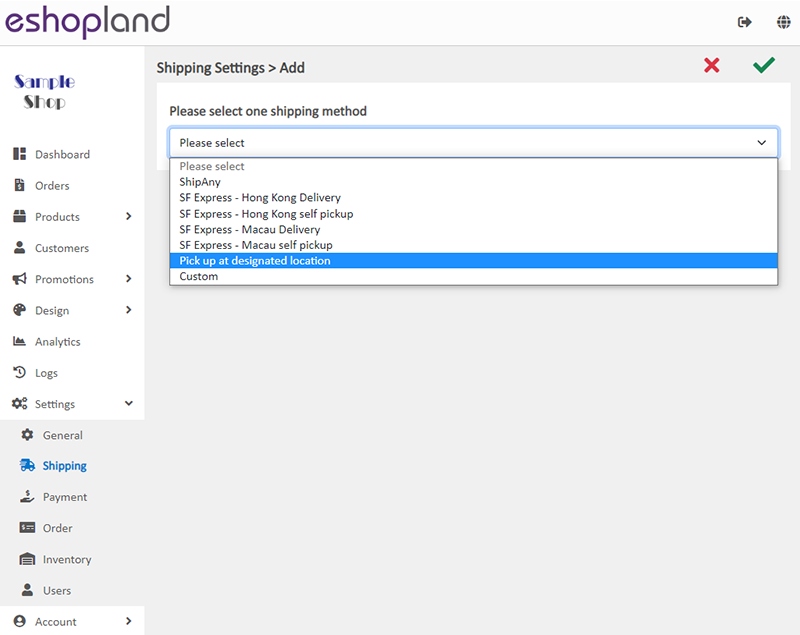
Go to Admin Panel > Settings > Shipping, click Add  and select Pick up at designated location on the list.
2. Set up Free Self-Pick-up as Shipping Method.
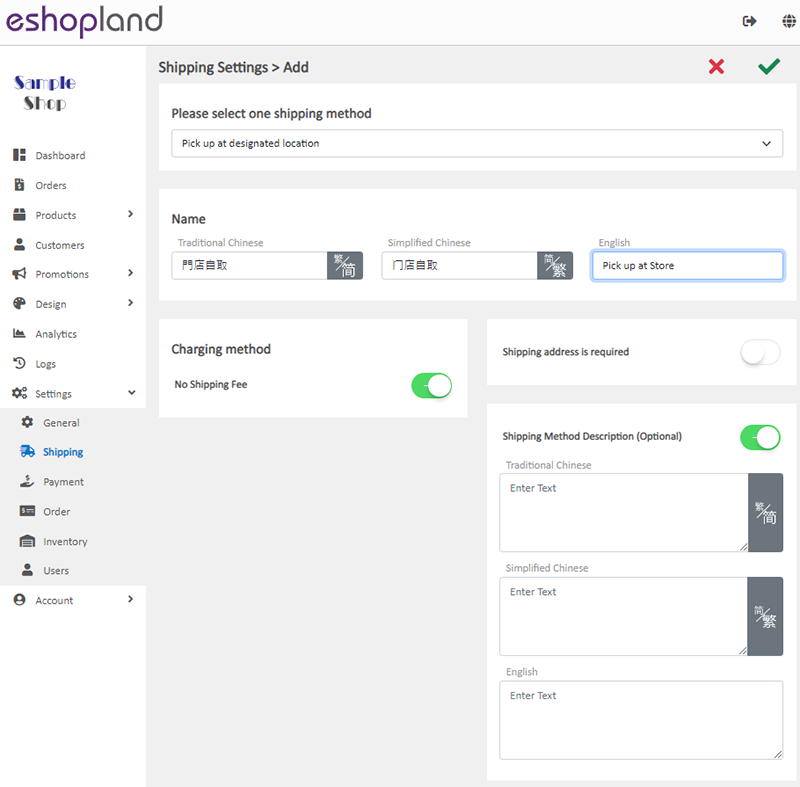
Enter custom Shipping Method Name, such as Pick up at Store, Pick up at Office, Collect at Pick up points, etc.
When you set up Free Self-Pick-up, you can Enable  No Shipping Fee feature, that means no shipping free will be charged on customers. The other charging method settings will be auto hidden in order to simplify the set up procedures.
When you set up Free Self-Pick-up and customer’s shipping address is not required, you can Disable  Shipping Address is Required.
Customers will not be required to provide a shipping address when proceeding shopping cart checkout.
You can choose to enter Shipping Method Description, such as the store address, pick up point details, other terms and notes, etc.
3. Save  the changes.
Popular Articles


You May Also Like
Facebook Page Auto-receive Post Orders
eshopland e-commerce platform has launched the Facebook Page Auto-receive Post Orders feature, allowing merchants to effortlessly receive customer orders through Facebook Page posts. When customers... [read more]
Start Live Stream Auto Order
Merchants who have subscribed the Live Stream Auto Order feature simply need to complete a straightforward setup in eshopland online shop backend. This setup allows merchants to automatically receiv... [read more]
Macau e-Wallets Payment
To satisfy the payment requirements of Macau merchants, eshopland ecommerce platform has incorporated a series of Macau-specific static QR code payment methods (including: BOC Pay (Macau), CGBPay, ... [read more]
Tracking Tools – Facebook Pixel
Adding Meta Pixel (formerly named as Facebook Pixel) on your eshopland online shop, allow you to understand the actions customers take on your shop webpages, such as adding items to shopping cart, o... [read more]