Tracking Tools – Facebook Pixel
Adding Meta Pixel (formerly named as Facebook Pixel) on your eshopland online shop, allow you to understand the actions customers take on your shop webpages, such as adding items to shopping cart, or buying your products. You can use the Metal Pixel make sure your ads are shown to the right people.
1. Create Business Account in Meta / Facebook Business Manager
Go to Meta Business Manager to create your business account.

2. Add a Facebook Pixel
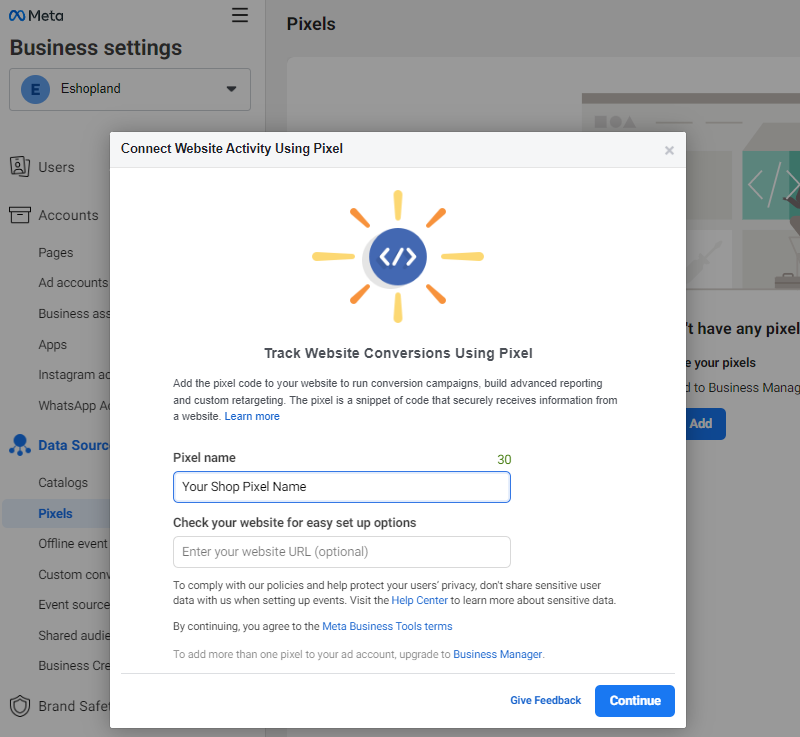
Go to Meta Business Settings > Data Sources > Pixels, then press “Add”.

Fill in the Pixel name and your shop Website (optional), then press “Continue”. The pixel will be created instantly.
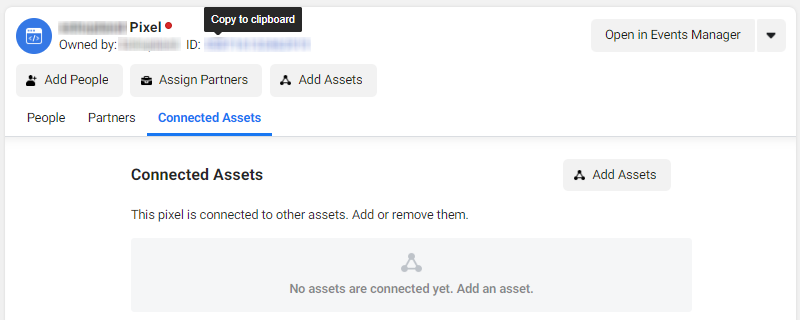
3. Copy the Pixel ID
Go back to Meta Business Settings > Data Sources > Pixels to view all the pixels you have created.
Select the pixel and copy the Pixel ID (a 15-digit number).
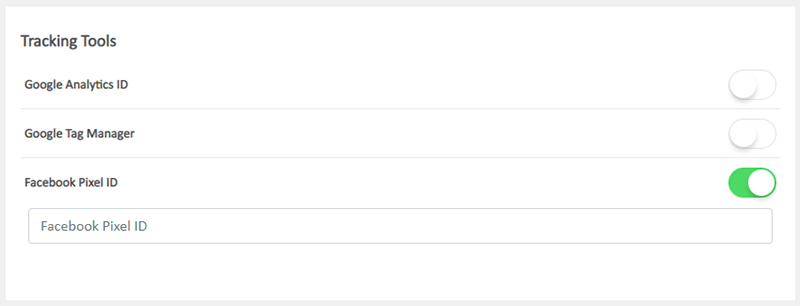
4. Adding the Meta / Facebook Pixel ID onto your eshopland account
Go to eshopland Admin Panel > Settings > Integration > Tracking Tools.
 Enable Facebook Pixel ID and paste your Pixel ID into the field, then press Save
  to complete.
Now, you can set up or view the pixel data on Meta Business Manager.
Popular Articles


You May Also Like
Company Information
Merchants can provide company information and contact person details on eshopland platform admin panel, to ensure our close connection with the merchants.1. Fill in the Company Information of the o... [read more]
Media Gallery Folders
Merchants can make good use of the multifunctional media gallery built into eshopland online shop platform. By creating different media folders in the media gallery, merchants can categorize and sto... [read more]
Purchase Domain on GoDaddy
eshopland ecommerce platform offers a free shop link (yourshop.eshopland.com) for every merchant. You can also purchase a domain and connect to eshopland ecommerce system, to be your shop’s URL. A d... [read more]
Promotion Settings
Merchants can set different discounts and promotions on eshopland ecommerce platform (such as free shipping, order discounts, fixed amount discounts, specific product discounts, free gifts, etc.), a... [read more]