Advanced Footer Design
To enhance the design flexibility for merchants to personalize the shop webpages, eshopland Layout Designer has added advanced footer design elements. Merchants can customize the footer style to match your shop design concept.
1. Enter the Layout Designer
Go to Admin Panel > Design > Pages,
Select a page and enter the Page Settings,
Press Edit  to enter the Layout Designer.
2. Advanced Footer Design
Unfold the Footer Menu Bar on the left tool area.
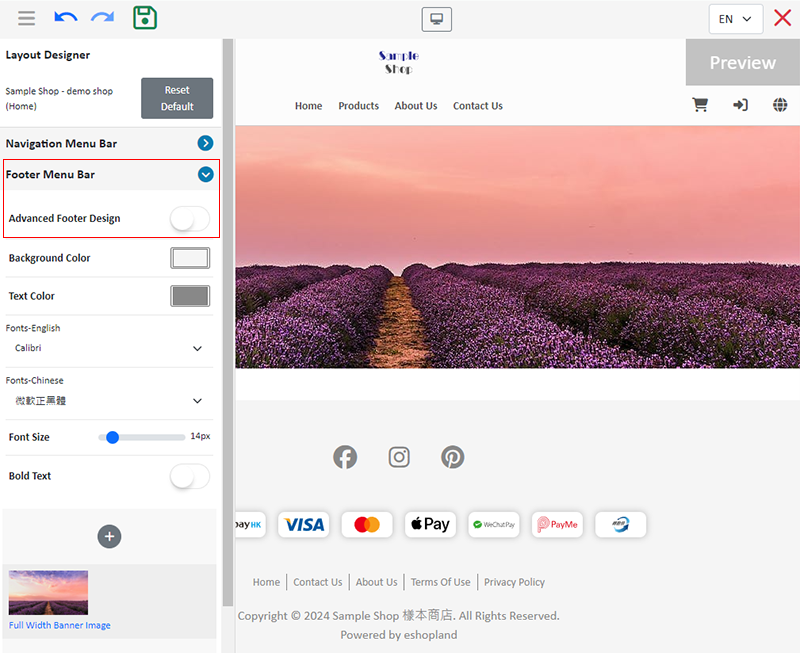
Enable  the Advanced Footer Design.
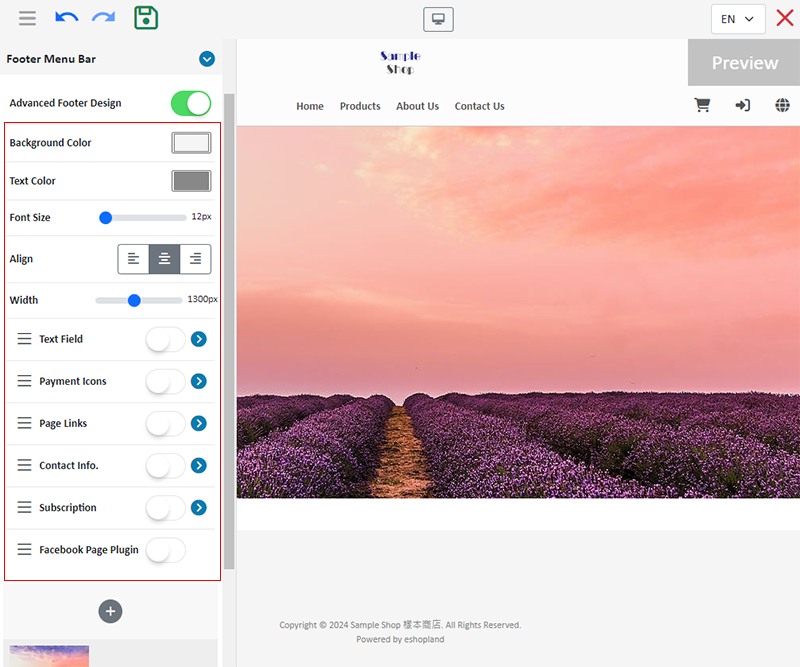
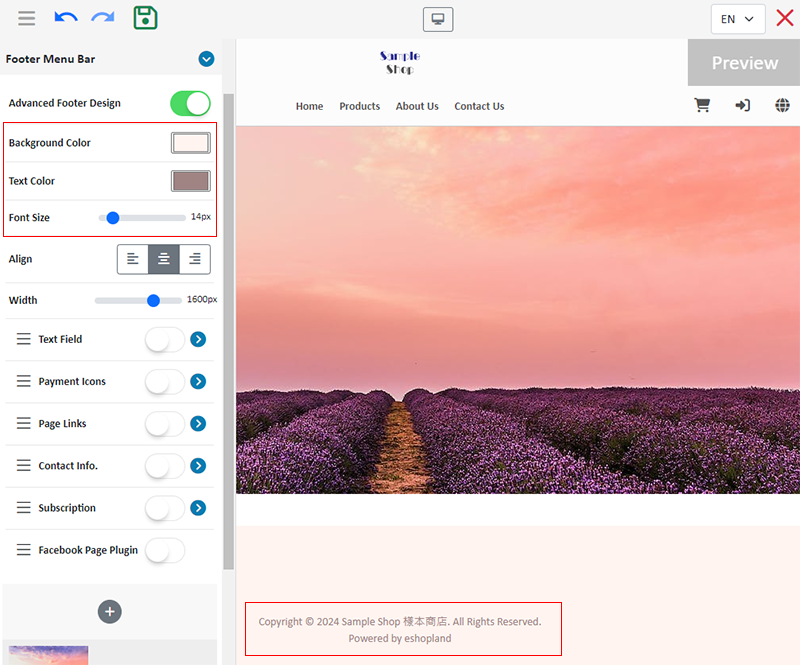
3. Footer Background and Font Color
Background Color
Pick a color directly, or enter RBG or HEX color code.
Font Color
Pick a color directly, or enter RBG or HEX color code.
Set color for All Rights Reserved and “Powered by eshopland” text.
Font Size
Set the font size of the footer.
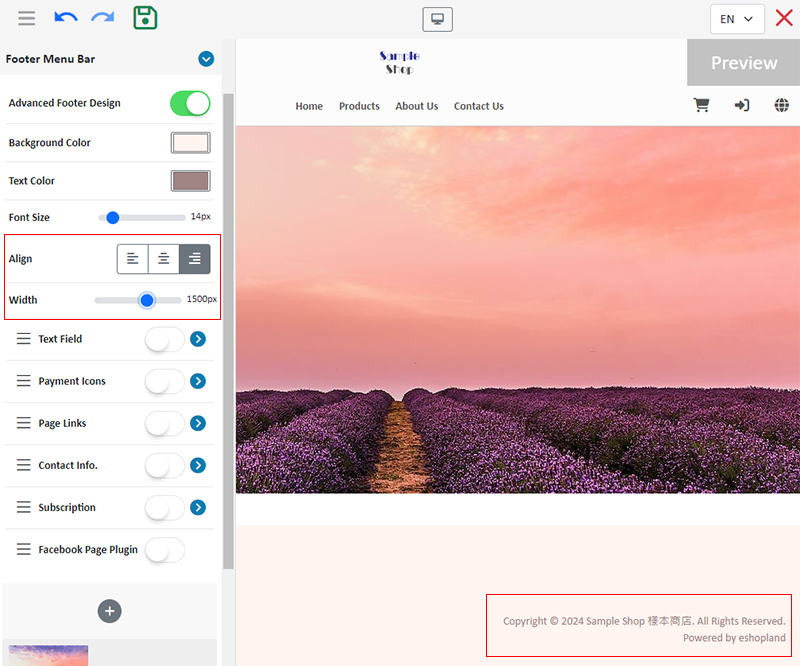
Alignment
Set footer text position to align “Left”, “Center” or “Right”.
Width
Set the width of the footer content when showing on desktop.
4. Footer Design
The system supports adding the following Footer Design Widgets:
Text Field
Payment Icons
Page Links
Contact Info
Subscription
Facebook Page Plugin
Move the widgets  by drag & drop method to reorder the widgets.
Disable  the widget to hide the widget on the footer of the shop webpages.

5. Text Field Widget
You can add shop description, product features or other information in the text field widget.
Enable and Unfold the Text Field Widget,
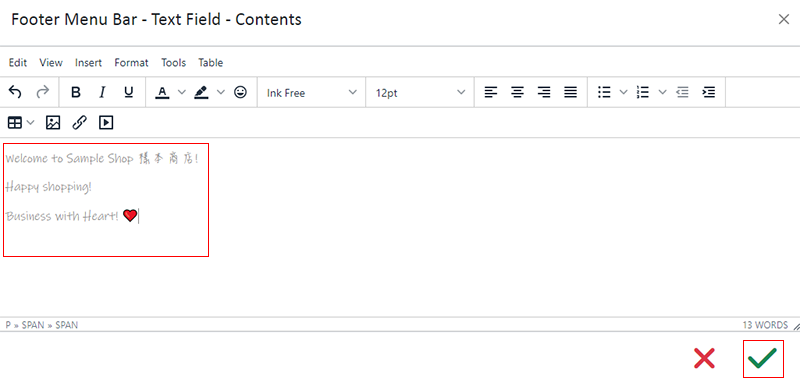
Press Edit to enter the multi-functional text field.
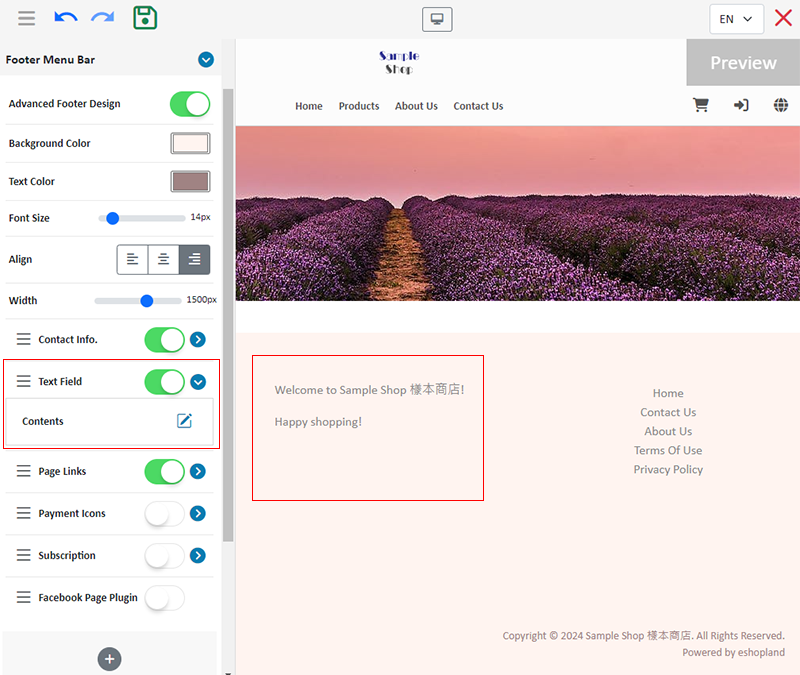
You can customize the text content on the multi-functional text field.
Confirm  when finished editing the text.
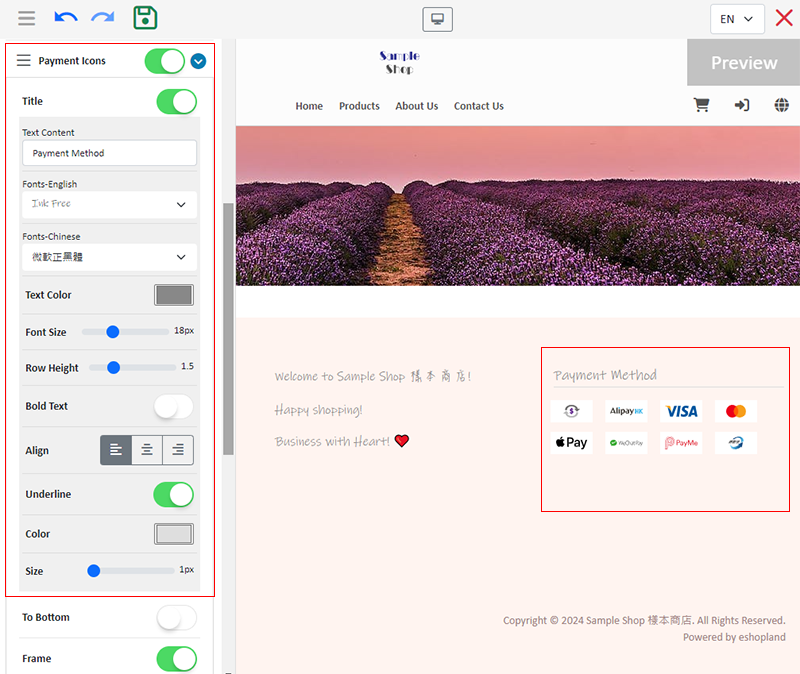
6. Payment Icons Widget
Enable and Unfold the Payment Icons Widget to customize the following settings:
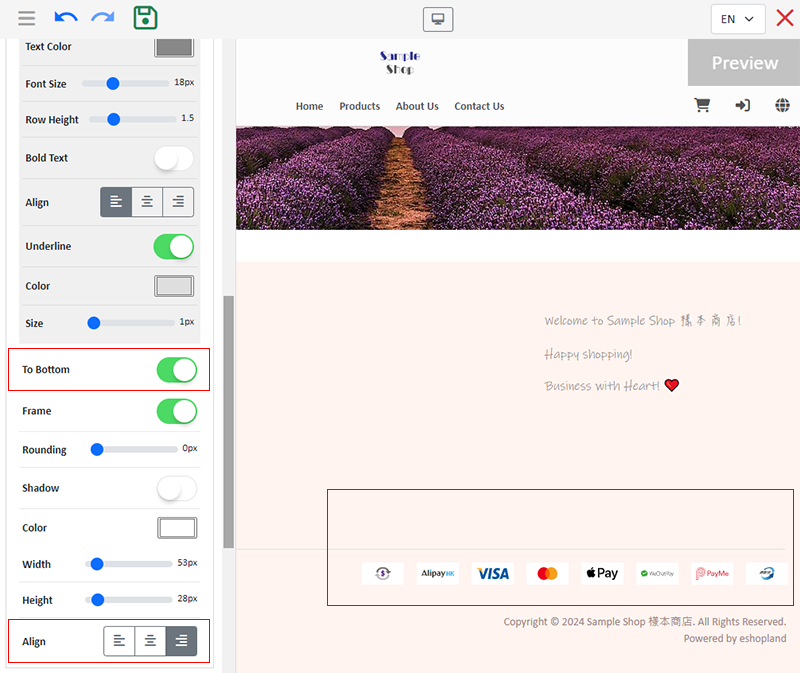
Position (To Bottom or not)
Design (Frame, Round-corner, Shadow and Background Color)
Size (Width and Height)
Alignment (“Left”, “Center” or “Right”)
The system will automatically display the payment icons according to the Payment Settings (Admin Panel > Settings > Payment) of the online shop.

Enable Payment Icons “Title” feature to customize the settings of the “Title”:
Text Content
Text Design (Text Color, Font Size, Row Height and Bold Text)
Alignment (“Left”, “Center” or “Right”)
Underline (Color and Size)
Demo example:
- Payment Icons “To Bottom” and “Align Right”.
- Enable Payment Icons Widget “Title” and “Underline features, not entering any text for the title.
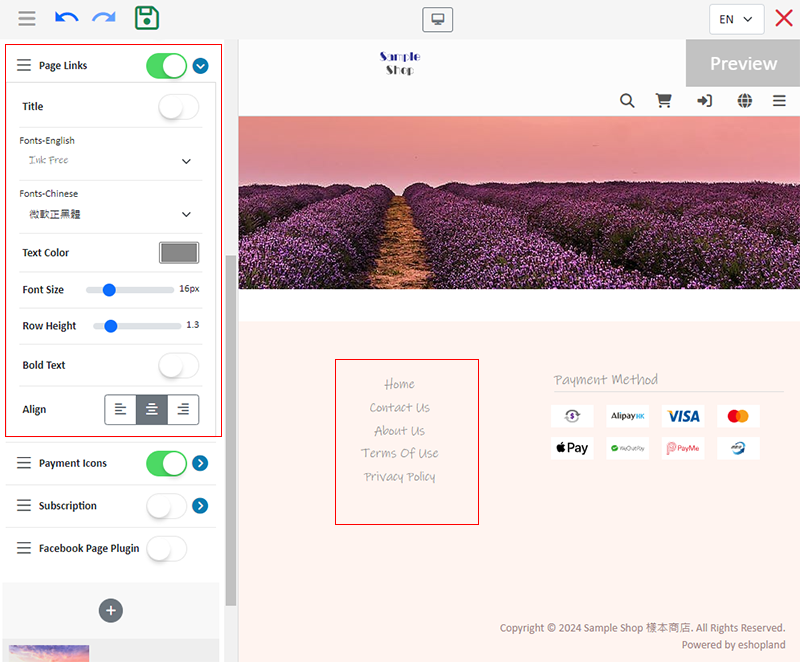
7. Page Links Widget
Enable  and Unfold the Page Link Widget to customize the following settings:
Text Design (Text Color, Font Size, Row Height and Bold Text)
Alignment (“Left”, “Center” or “Right”)
The system will auto display the page links according to the Footer Menu Items settings (Admin Panel > Design > Preferences) of the online shop.
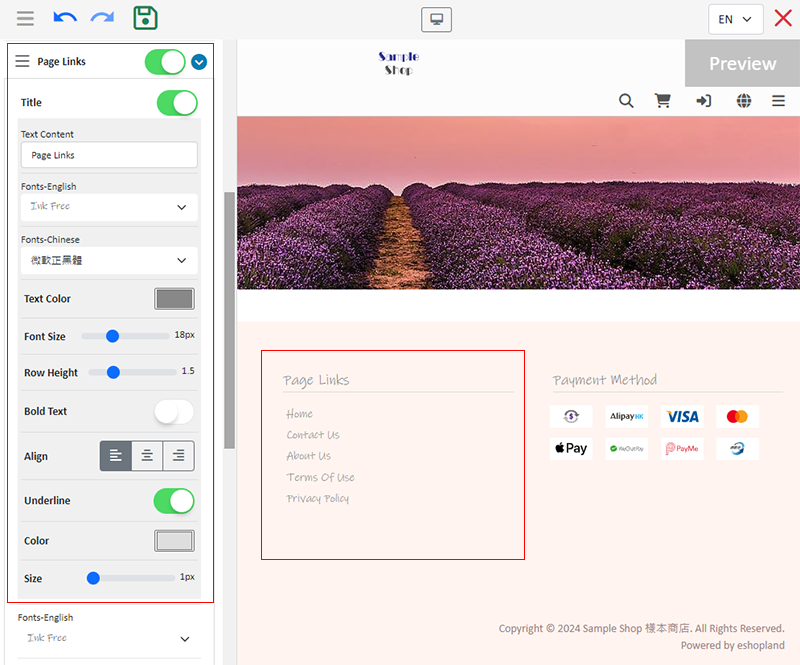
Enable Page Links “Title” feature to customize the settings of the “Title”:
Text Content
Text Design (Text Color, Font Size, Row Height and Bold Text)
Alignment (“Left”, “Center” or “Right”)
Underline (Color and Size)
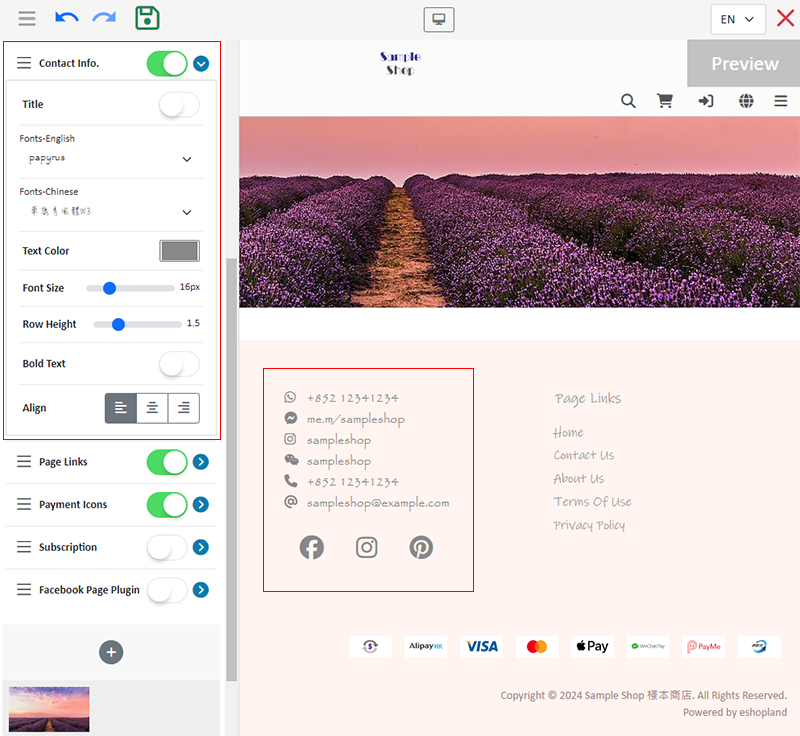
8. Contact Info Widget
Enable and Unfold the Contact Info Widget, to customize the following settings:
Text Design (Text Color, Font Size, Row Height and Bold Text)
Alignment (“Left”, “Center” or “Right”)
The system will auto display the contact information according to the details of the Customer Service Function and Social Media settings (Admin Panel > Design > Preferences) of the online shop.
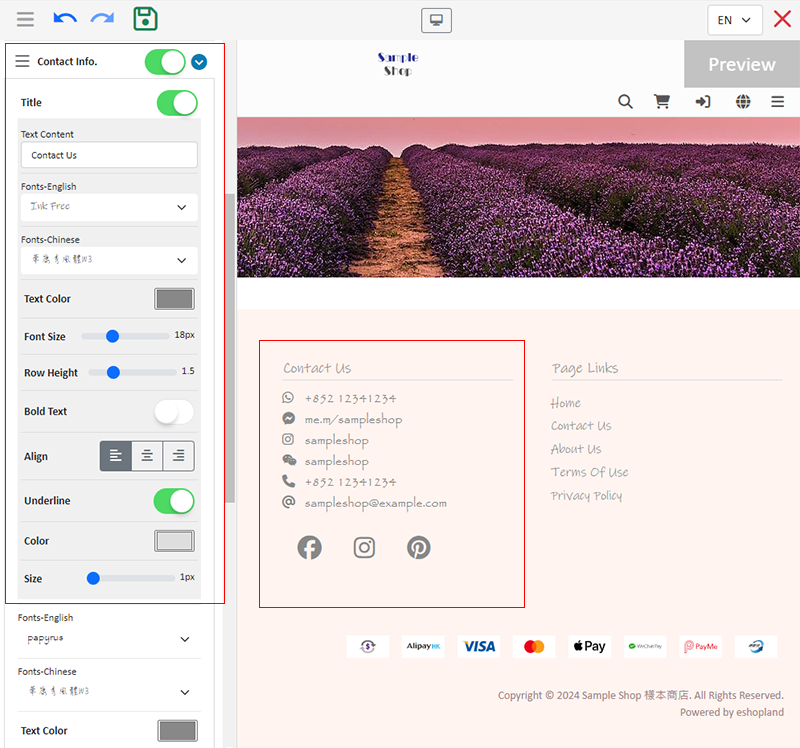
Enable Contact Info “Title” feature to customize the settings of the “Title”:
Text Content
Text Design (Text Color, Font Size, Row Height and Bold Text)
Alignment (“Left”, “Center” or “Right”)
Underline (Color and Size)
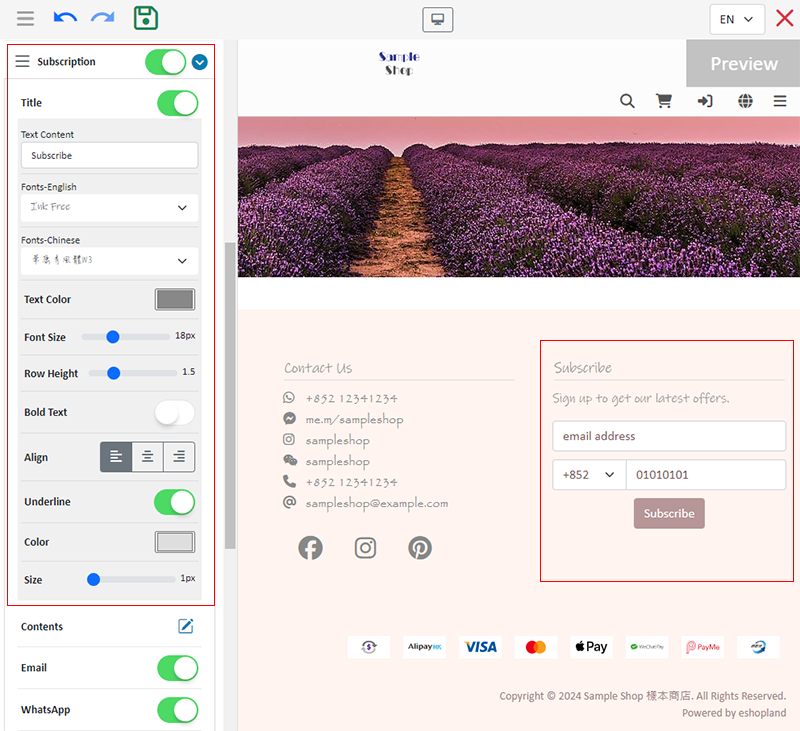
9. Subscription
Enable Subscription Widget to customize the following settings:
Press Edit to enter the multi-functional text field, to enter the text content.
Accept Subscription Methods (Email, WhatsApp)
Subscription Method Design (Field Text)
Alignment (“Left”, “Center” or “Right”)
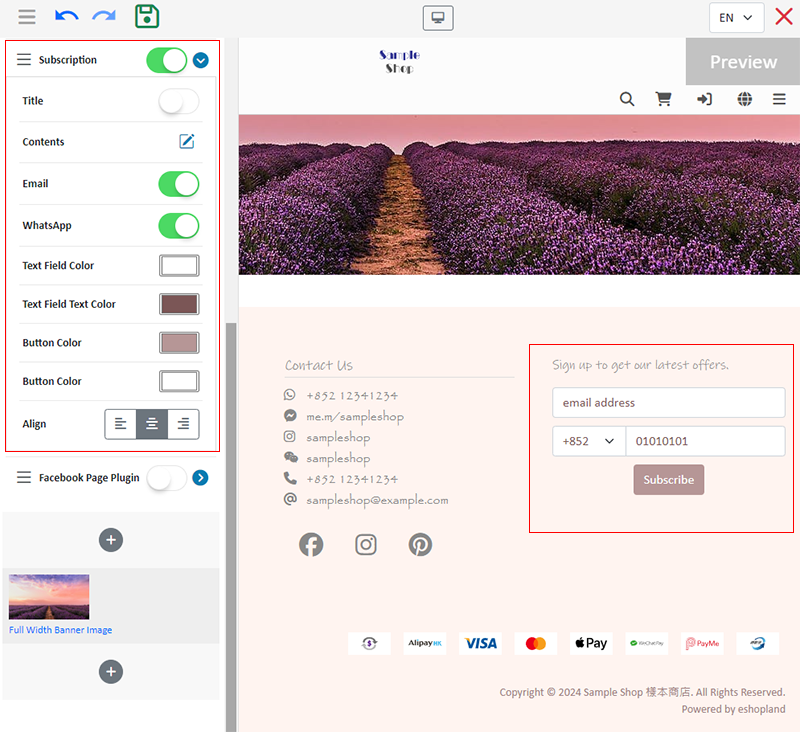
Enable  Subscription “Title” feature to customize the settings of the “Title”:
Text Content
Text Design (Text Color, Font Size, Row Height and Bold Text)
Alignment (“Left”, “Center” or “Right”)
Underline (Color and Size)
10. Facebook Page Plugin
Add the Facebook Page Plugin onto the footer of your shop webpage to promote your public Facebook Page on your online shop.
Enable Facebook Page Plugin to customize the following settings:
Alignment (“Left”, “Center” or “Right”)
The system will auto display your Facebook Page according to the Social Media settings (Admin Panel > Design > Preferences) of your online shop.
You must have entered the Facebook fan page link in the Social Media settings for the “Facebook Page Plugin” component button to appear in the advanced footer settings.

11. Apply the Settings
Save  the settings when finished.
Popular Articles


You May Also Like
Full Width Product Page
Applying a full width page design on the online shop can offer users a more engaging experience. By utilizing the flexible web design features of eshopland ecommerce platform, merchants can design ... [read more]
Time Limited Offers
Merchants can set various promotions and offers on eshopland ecommerce platform to boost sales. Time limited offers can effectively catch the consumer psychology and encourage immediate purchase.All... [read more]
Carousel
When you are working on your webpage design on eshopland, you can add a carousel (slider) module onto your online shop webpage, to attract customers’ attention, get more web traffic and effectively... [read more]
Submit Sitemap to Google
All eshopland shops auto generate sitemap, which is sitemap.xml file providing information of a website. Search engines read this file to crawl the website more efficiently. You only have to submit ... [read more]